

Model trains - switches
The pictures can be clicked on to see them in the original format in a new tab.
September 2020
While test running the trains on the shadow station level, I had to manually switch the switch.
Eight of the ten switches are old style electrical switches. And I did not connect them yet.
Because space around the table is limited, I started to experiment with servo's and an Arduino at my desk.
I had a arduino nano and a breakout board in stock. Decided to use these.
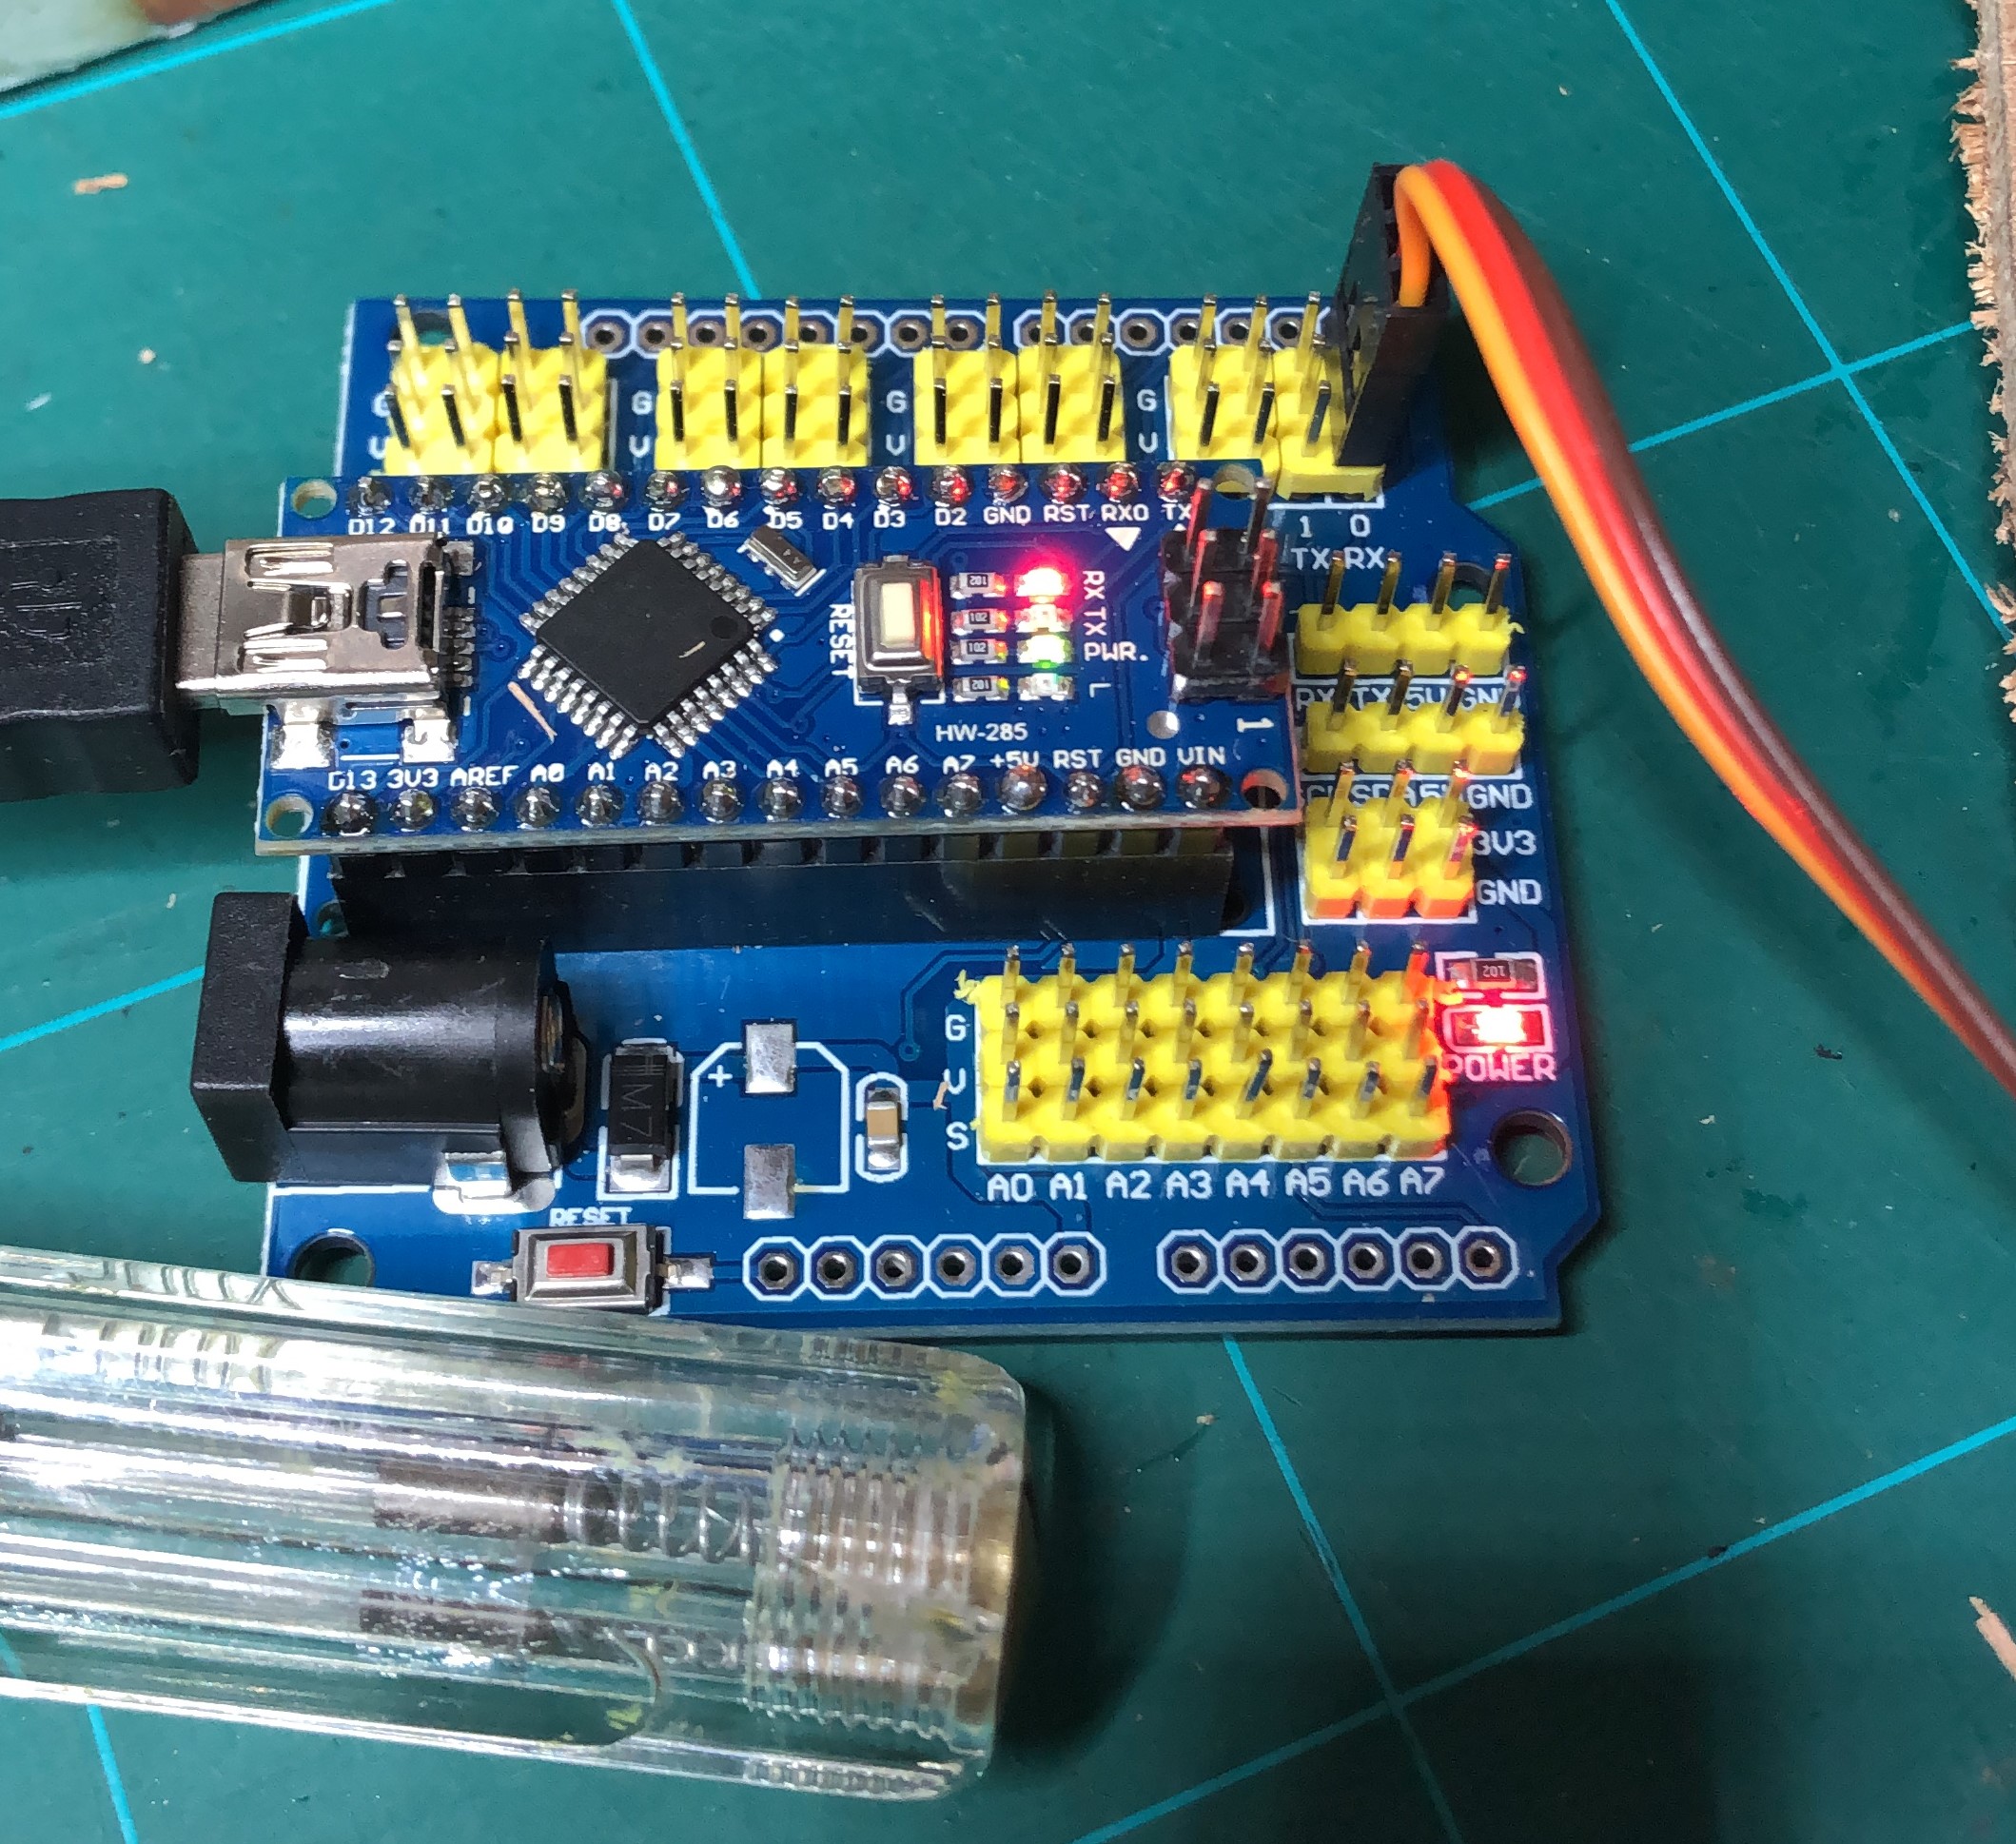
Arduino inserted in the breakout board and one servo connected
I am just a beginner with the arduino and the code (C, C++). Found some examples and I was ab;le to apadt these to my need.
There was a problem. I did nog use functions, so the code was executed sequential. Like I said, I am new to the arduino and ask some advise on the Benelux Spoor forum (all in Dutch).
Several people gave advise and on in particular, Bas, wrote some code for my needs. Bas does this just for fun. And I was his "golden" tester, as he named it.
After some adaptions the code worked fine. And I use it to drive my switches.
I also did an experiment with a electric Lima switch. You need a MOSFET drive to drive the coil in the switch. Per switch you need two MOSFET circuits.
Notice I only connected one coil for the test.
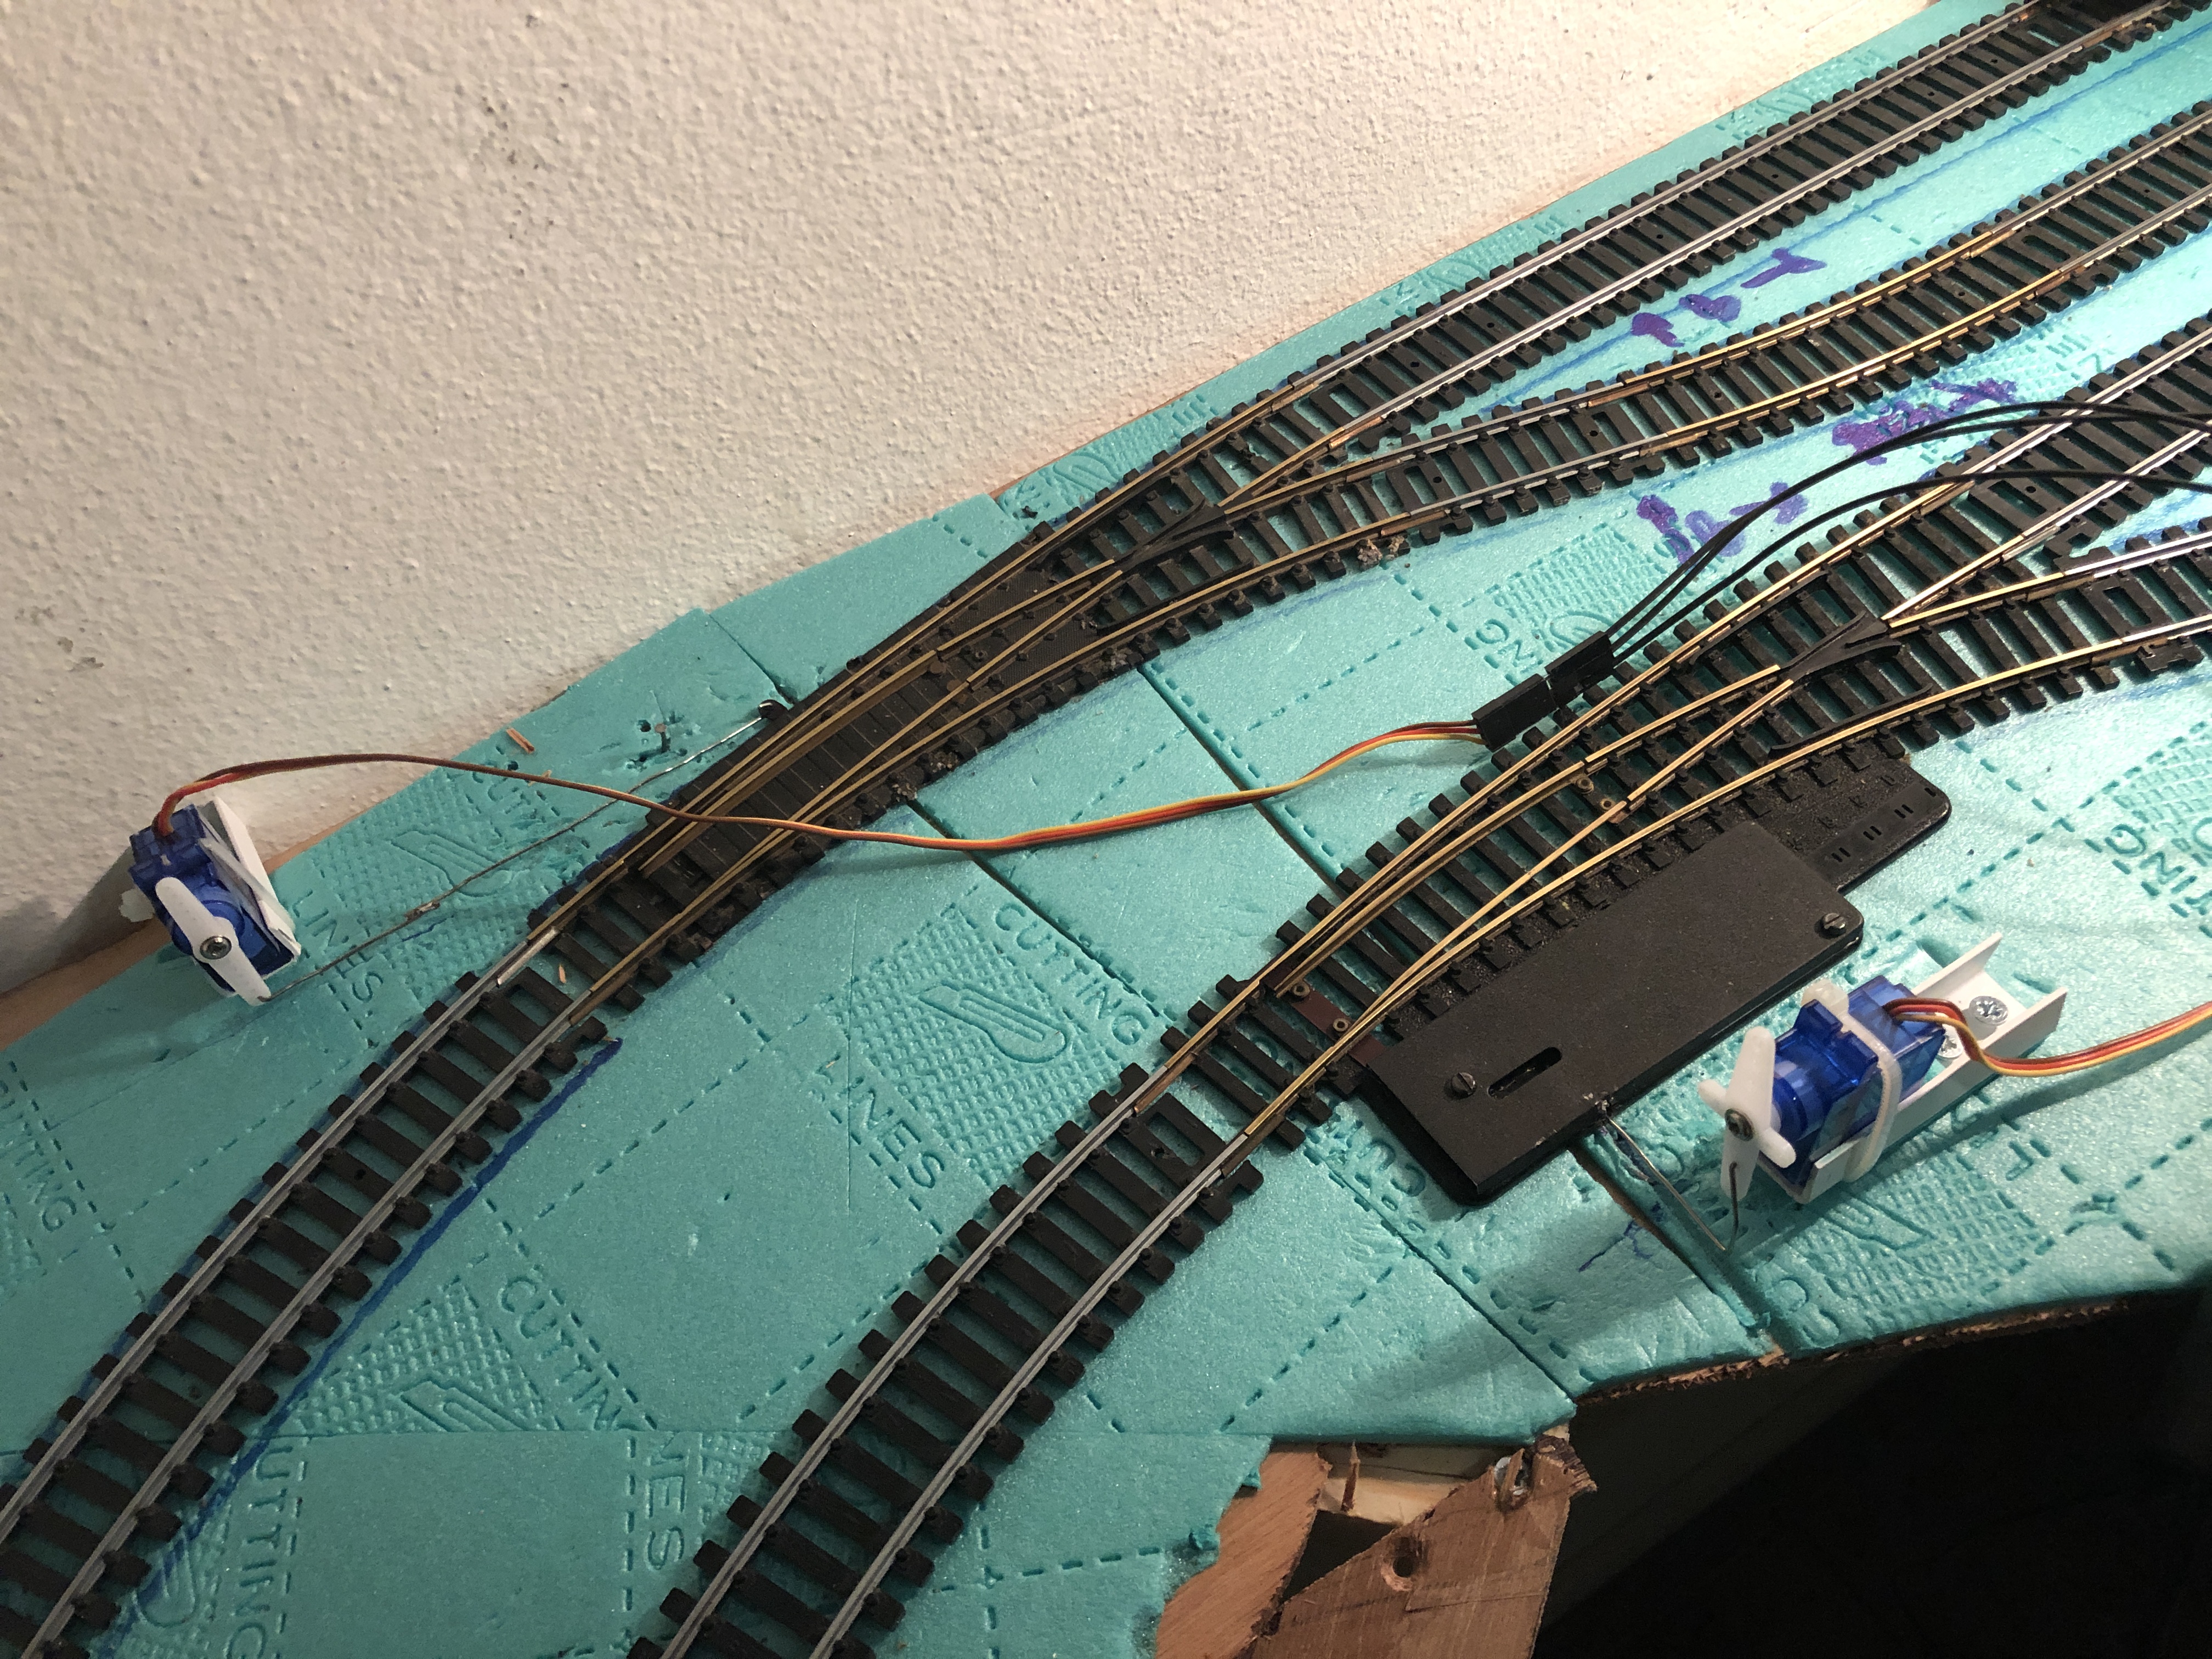
Now I have an idea how to do this in real life. And in real life you sometime struckle. There was limited space at the location of my tow switches I want to operate with the servo.
All you can do is find a new way. On the picture below you see I used a complete different way then in the test fase.
All my other switches are all electrical operated. Earlier I have experimented with the MOSFET board.
I made my decision and I will use the
ArCoMoRa Mardec software together with the
DCCnext board/box.
Ordered them together with some
ArLoco shiled and Okkie's. With a bit of luck they will arrive today.
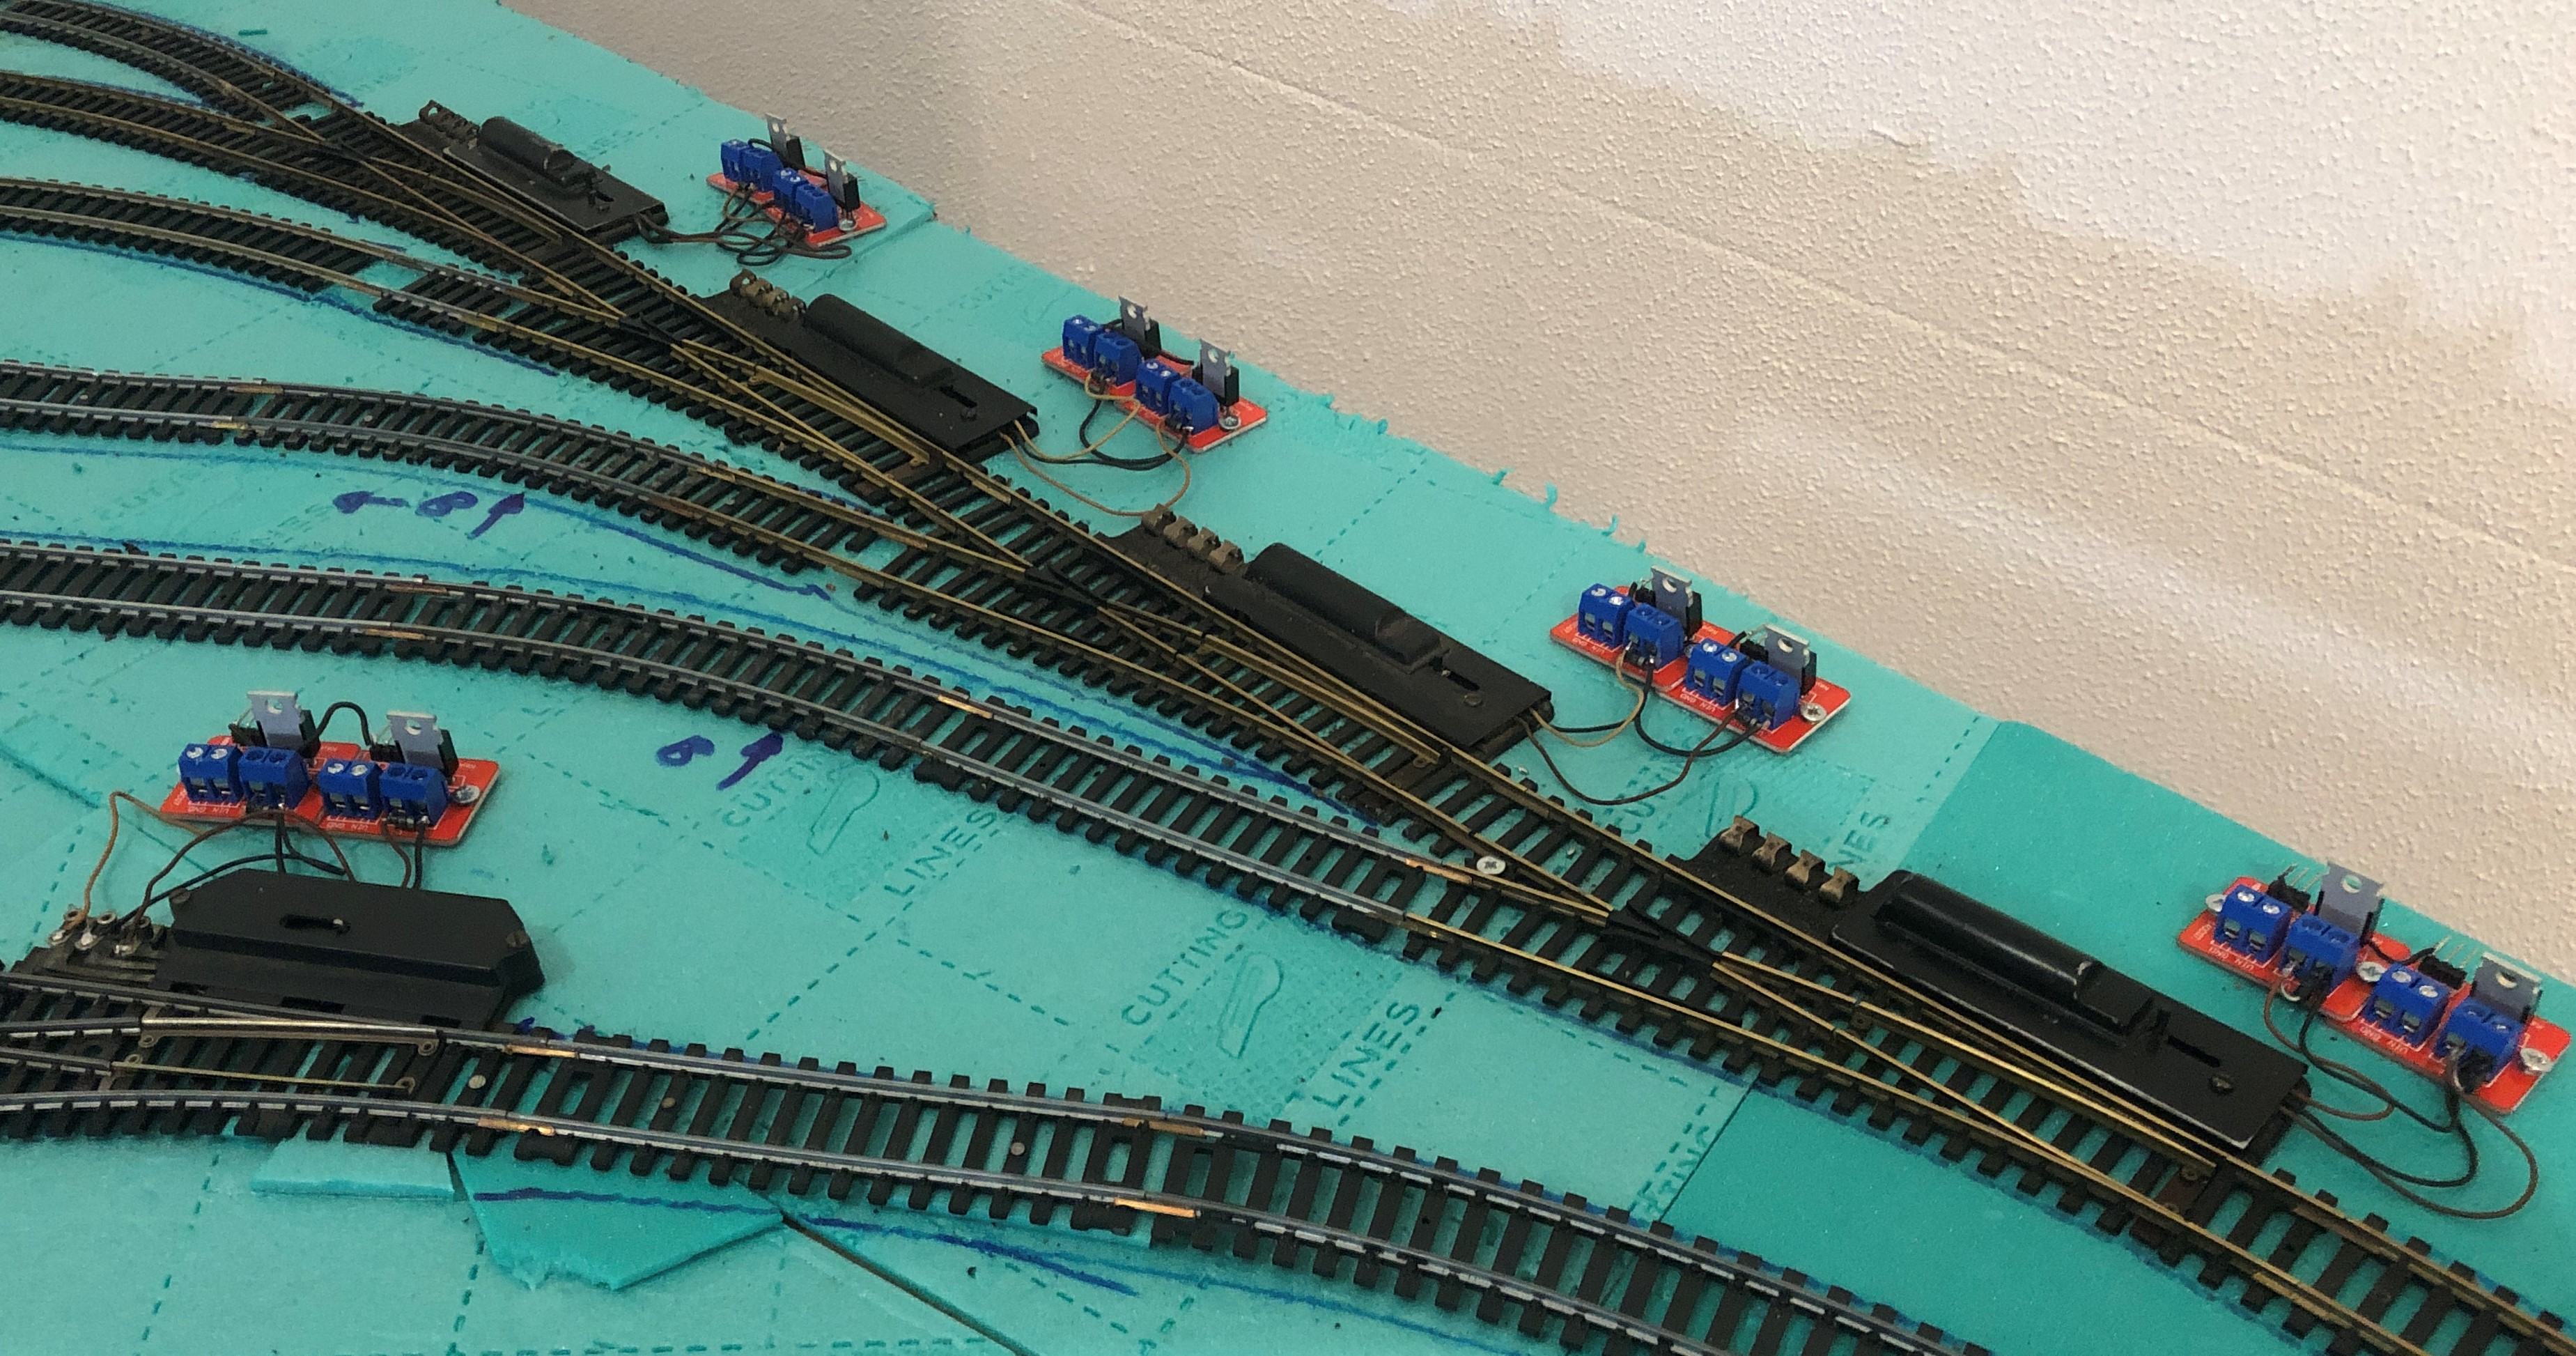
It was time to prepare my electric switches to work with the DCCnext and installed the eight MOSFET pairs on my layout.
To be continued when the ArCoMoRa stuff has arrived.
The Arcmora stuff came quick. Unfortunately there were some components missing. All was directly corrected by Nico Teering.
The remaining components will come in two days.
For me not an excuse to do nothing.
The MOSFET boards need power to drive the coils in the switches. And so it happened.
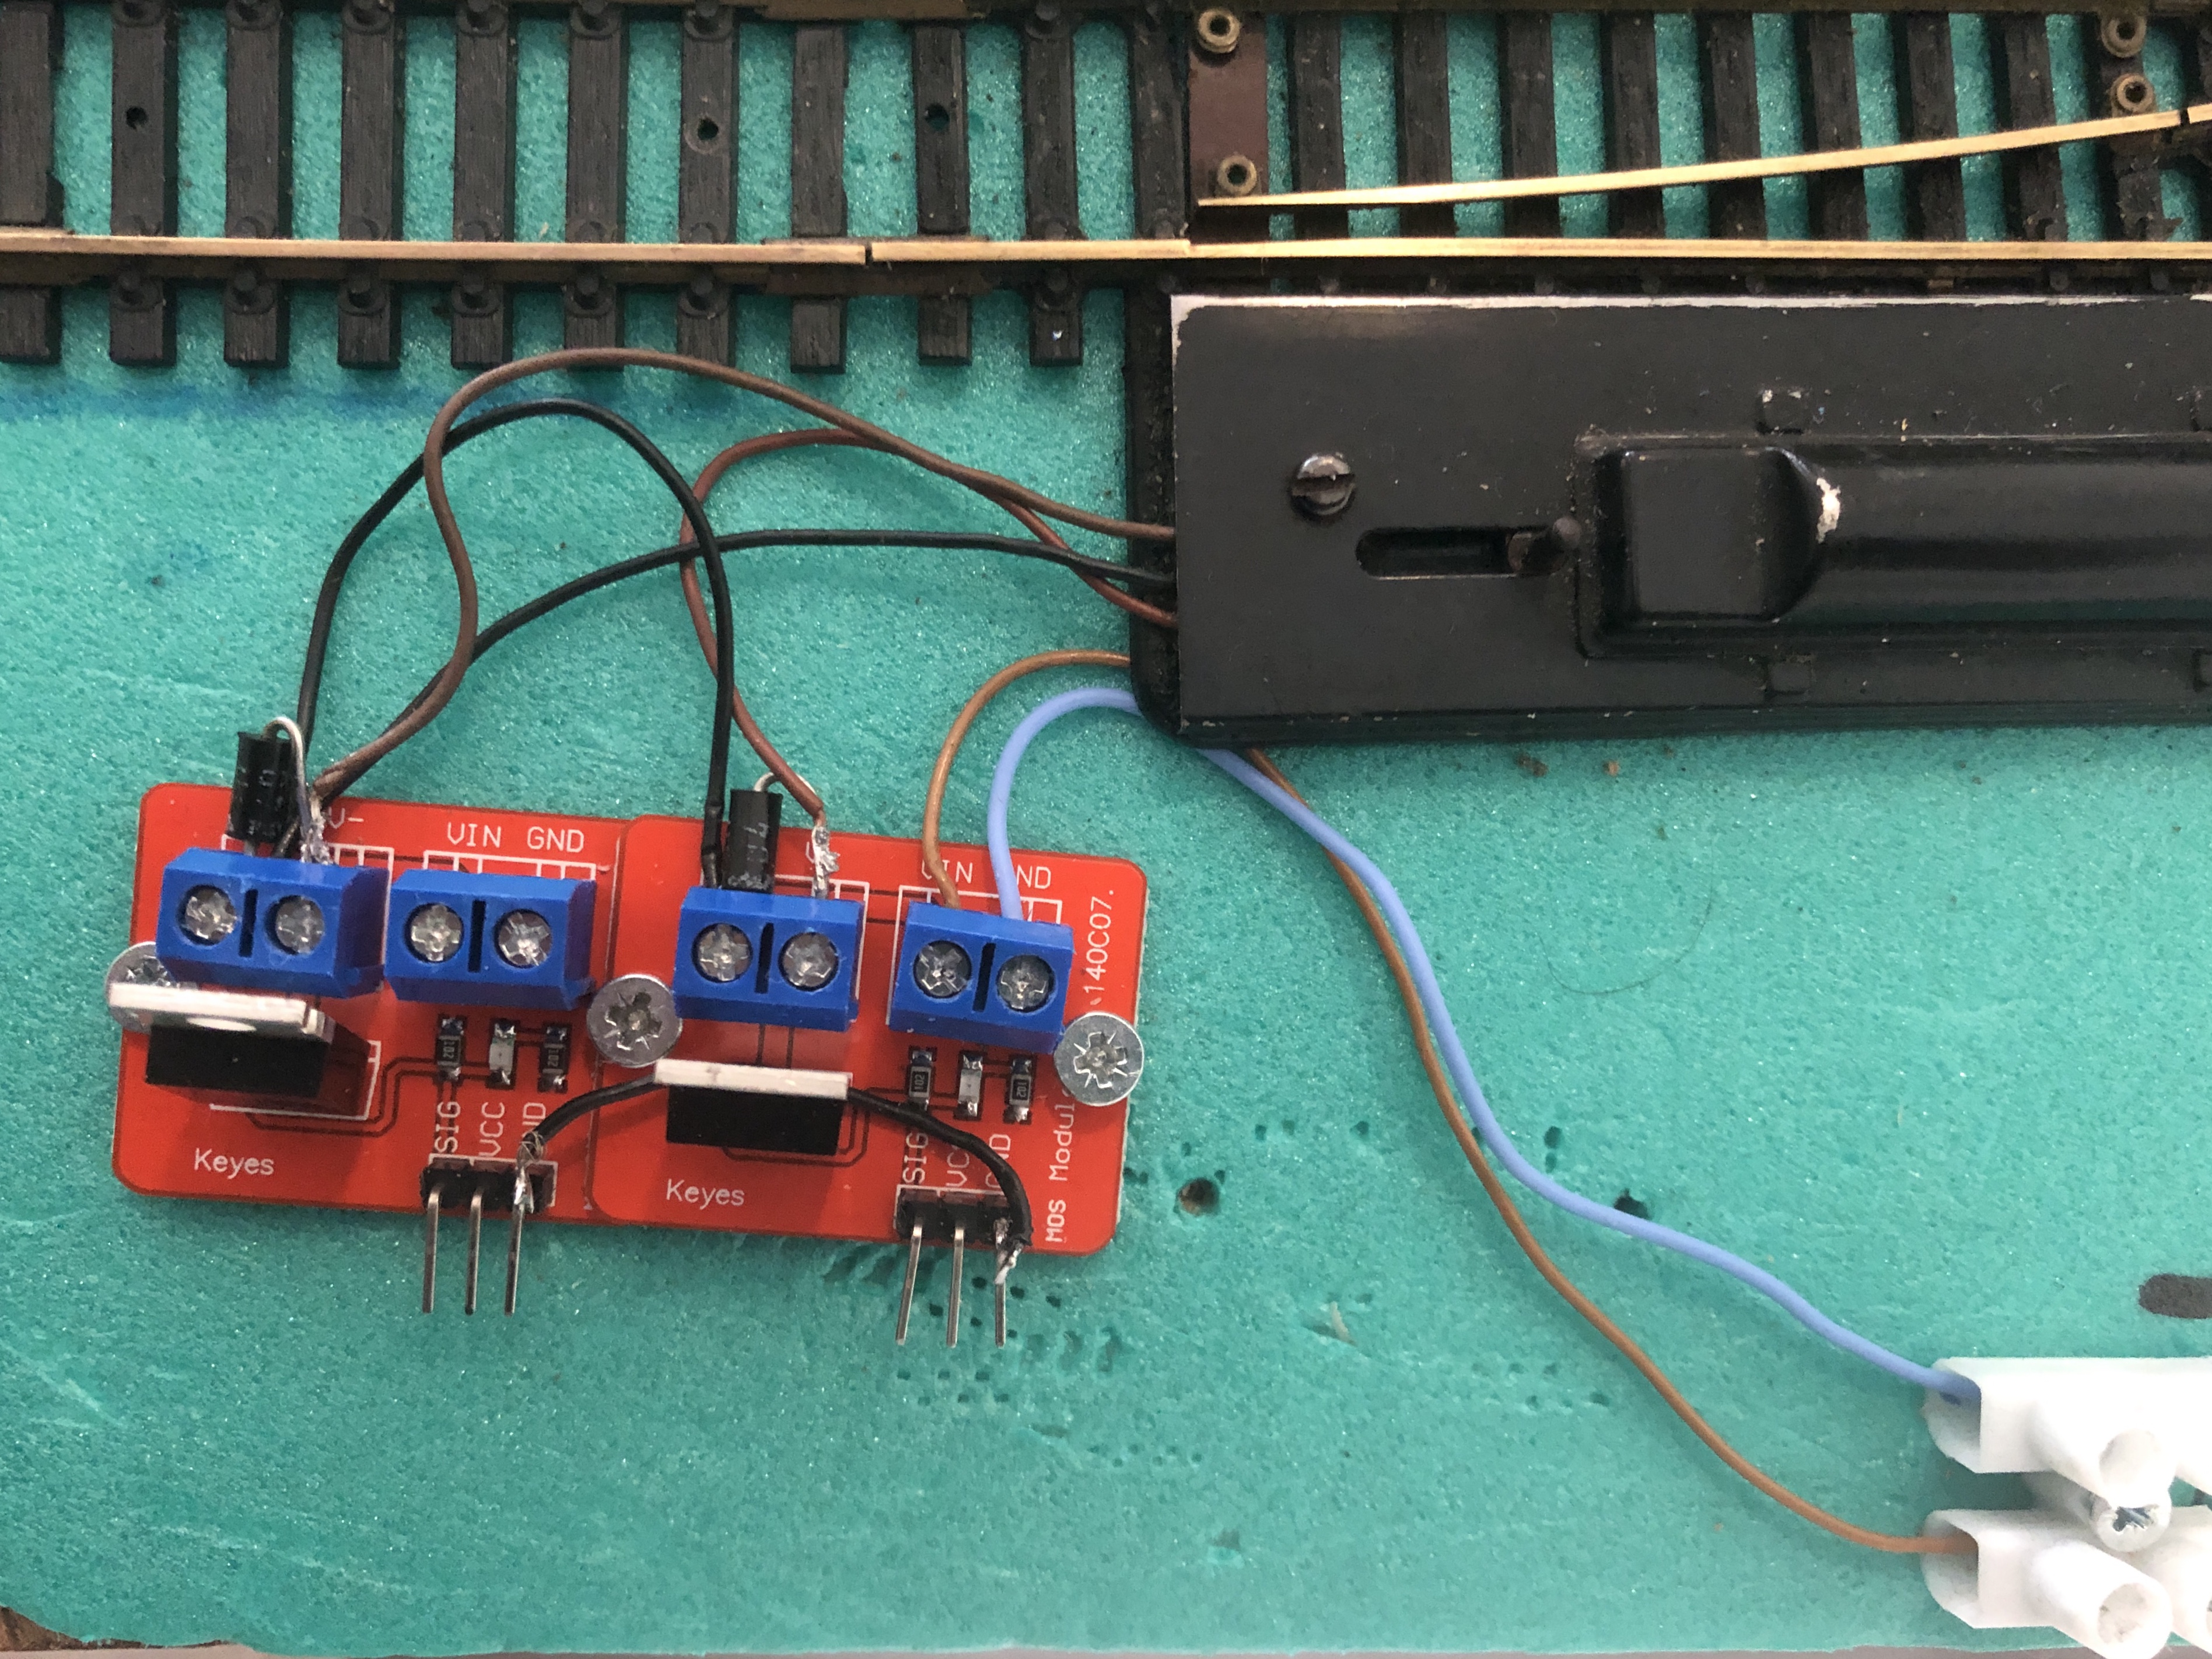
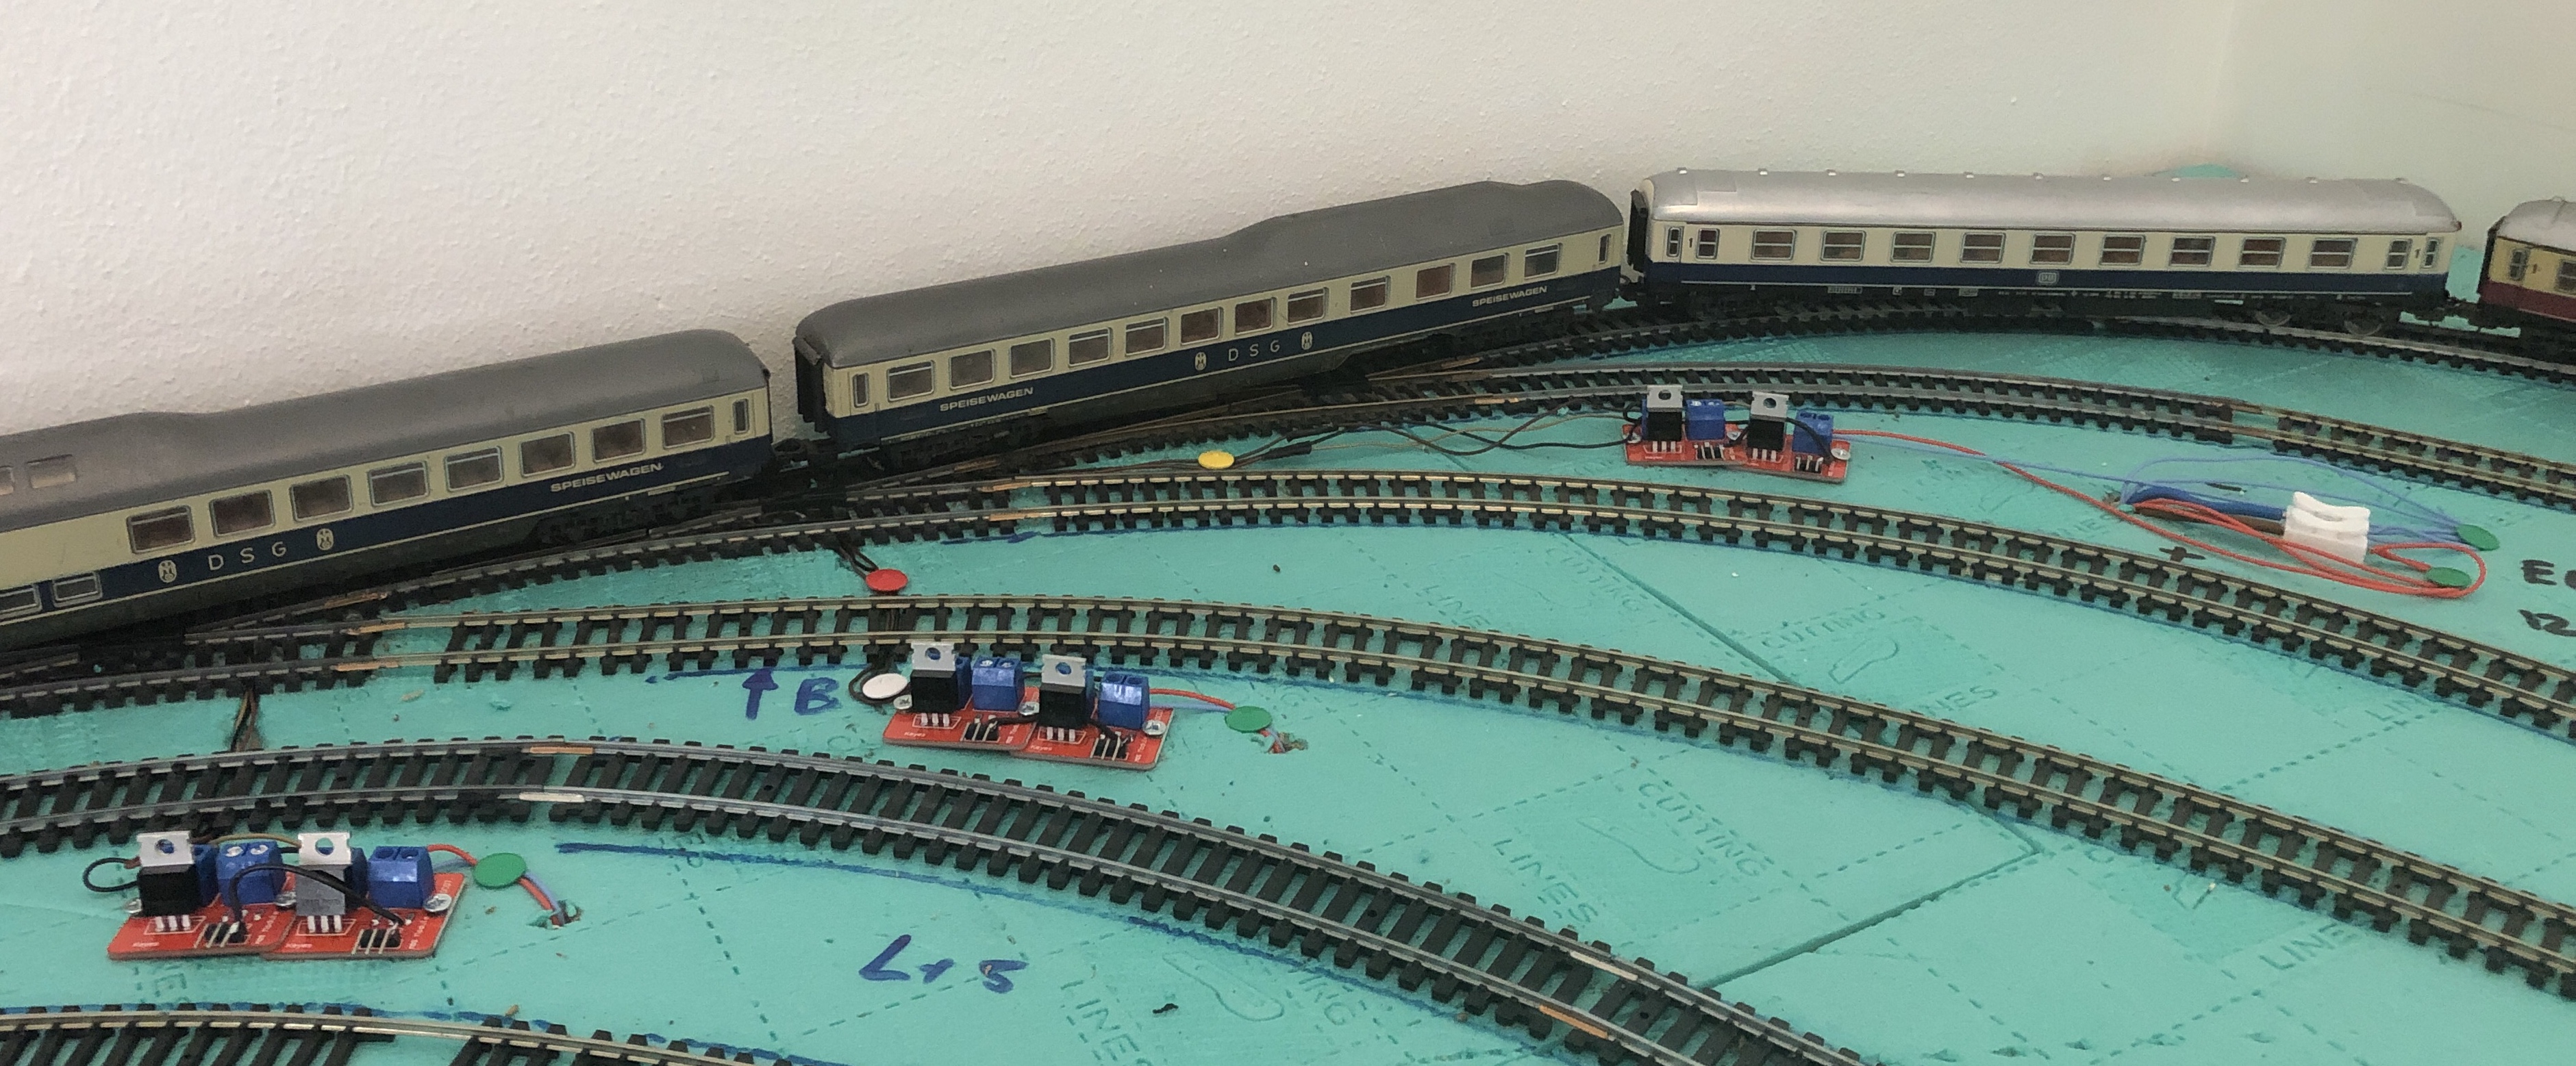
One of eight (pairs) MOSFET boards with power connected (brown and blue cable)
Used a "ring" line to feed the MOSFET boards. Power supply is and old one from work. Used to feed a, now obsolete, device.
Power suplly can been seen in the back.
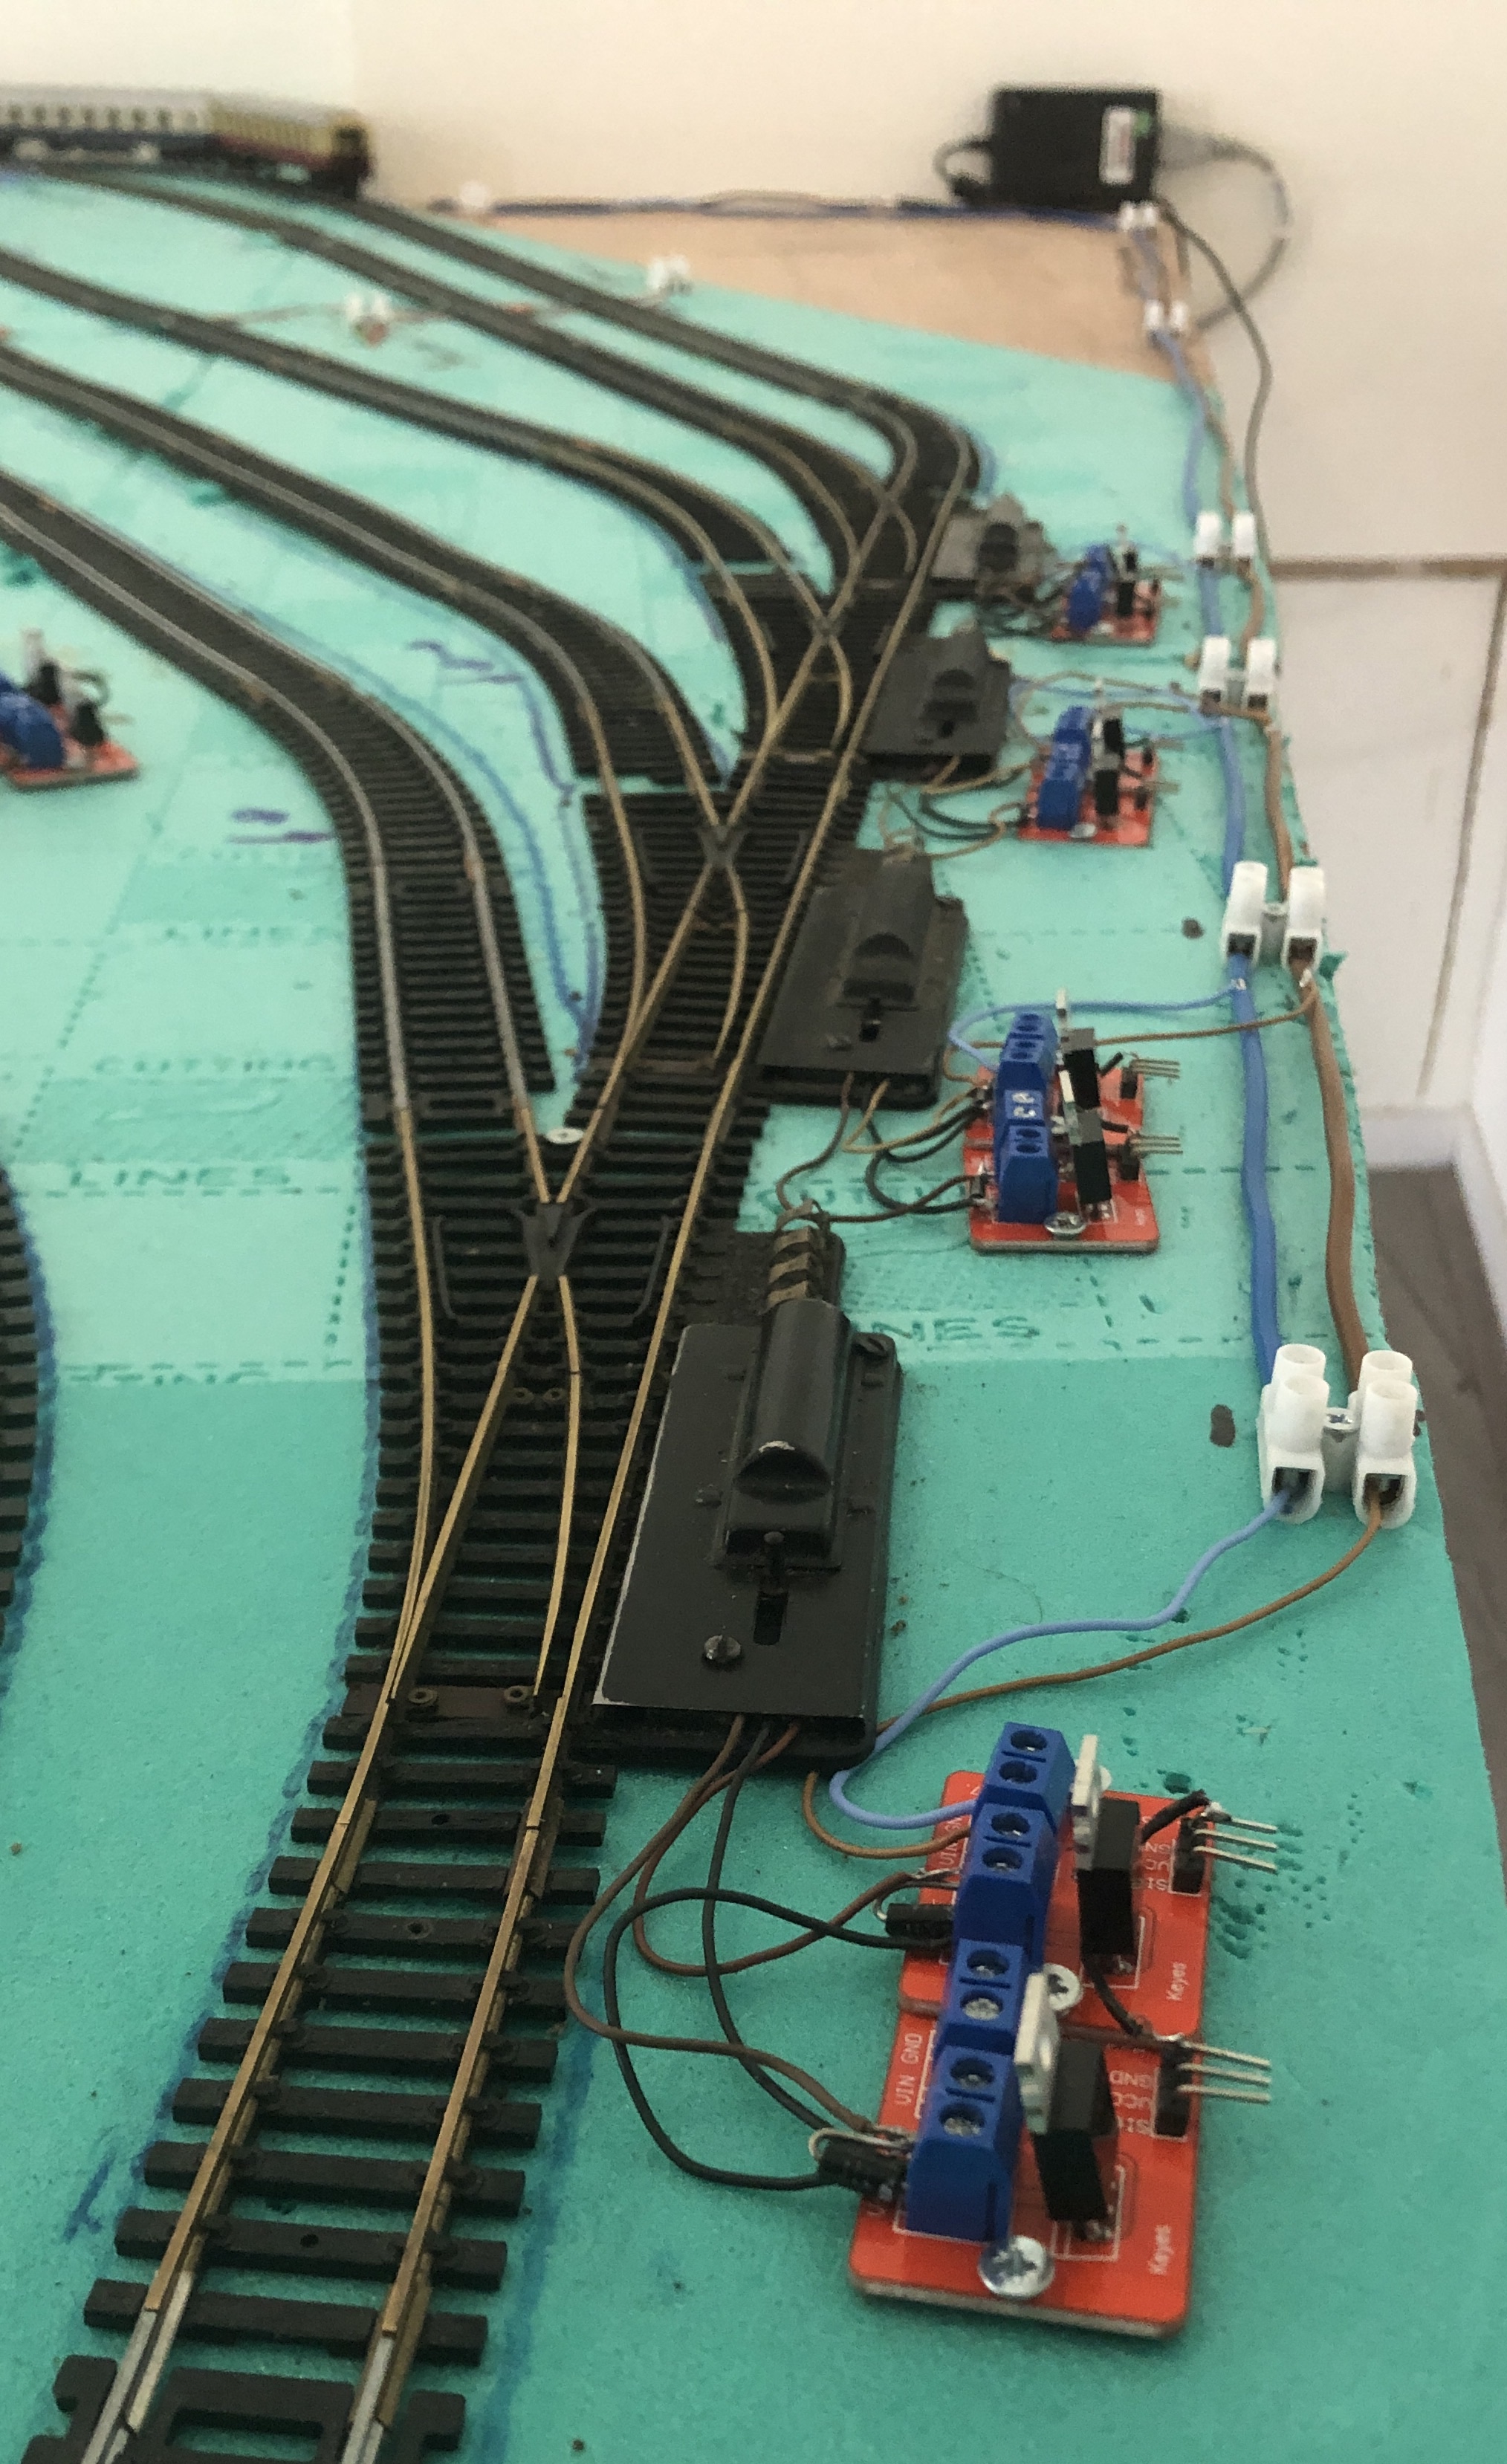
Four switches connected via "ring" line. Power supply in the back
And three more. Needed to drill some holes
When the remaining components for the DCCnext come in, I have to solder it together, configure it and, make some additional connections from the DCCnext to the servo's (tripple lines) and MOSFET boards (dual lines).
For the servo's I ordered extention cables. Not too long, because the servo signal line will pick up noise and the servo's will behave erratically.
February 2021
Finally I found time to continue building.
And it started with the nice smell of burned plastic in the morning on my shadow station.
One of the coils of one of the switches remained powered. This caused the coil to get hot and burn the plastic. I think you recognize it.
Thinking of the access I will have to the shadow station, I wondered whether I better not could use servo's instead of electric swiches.
I started experimenting on the workbench.
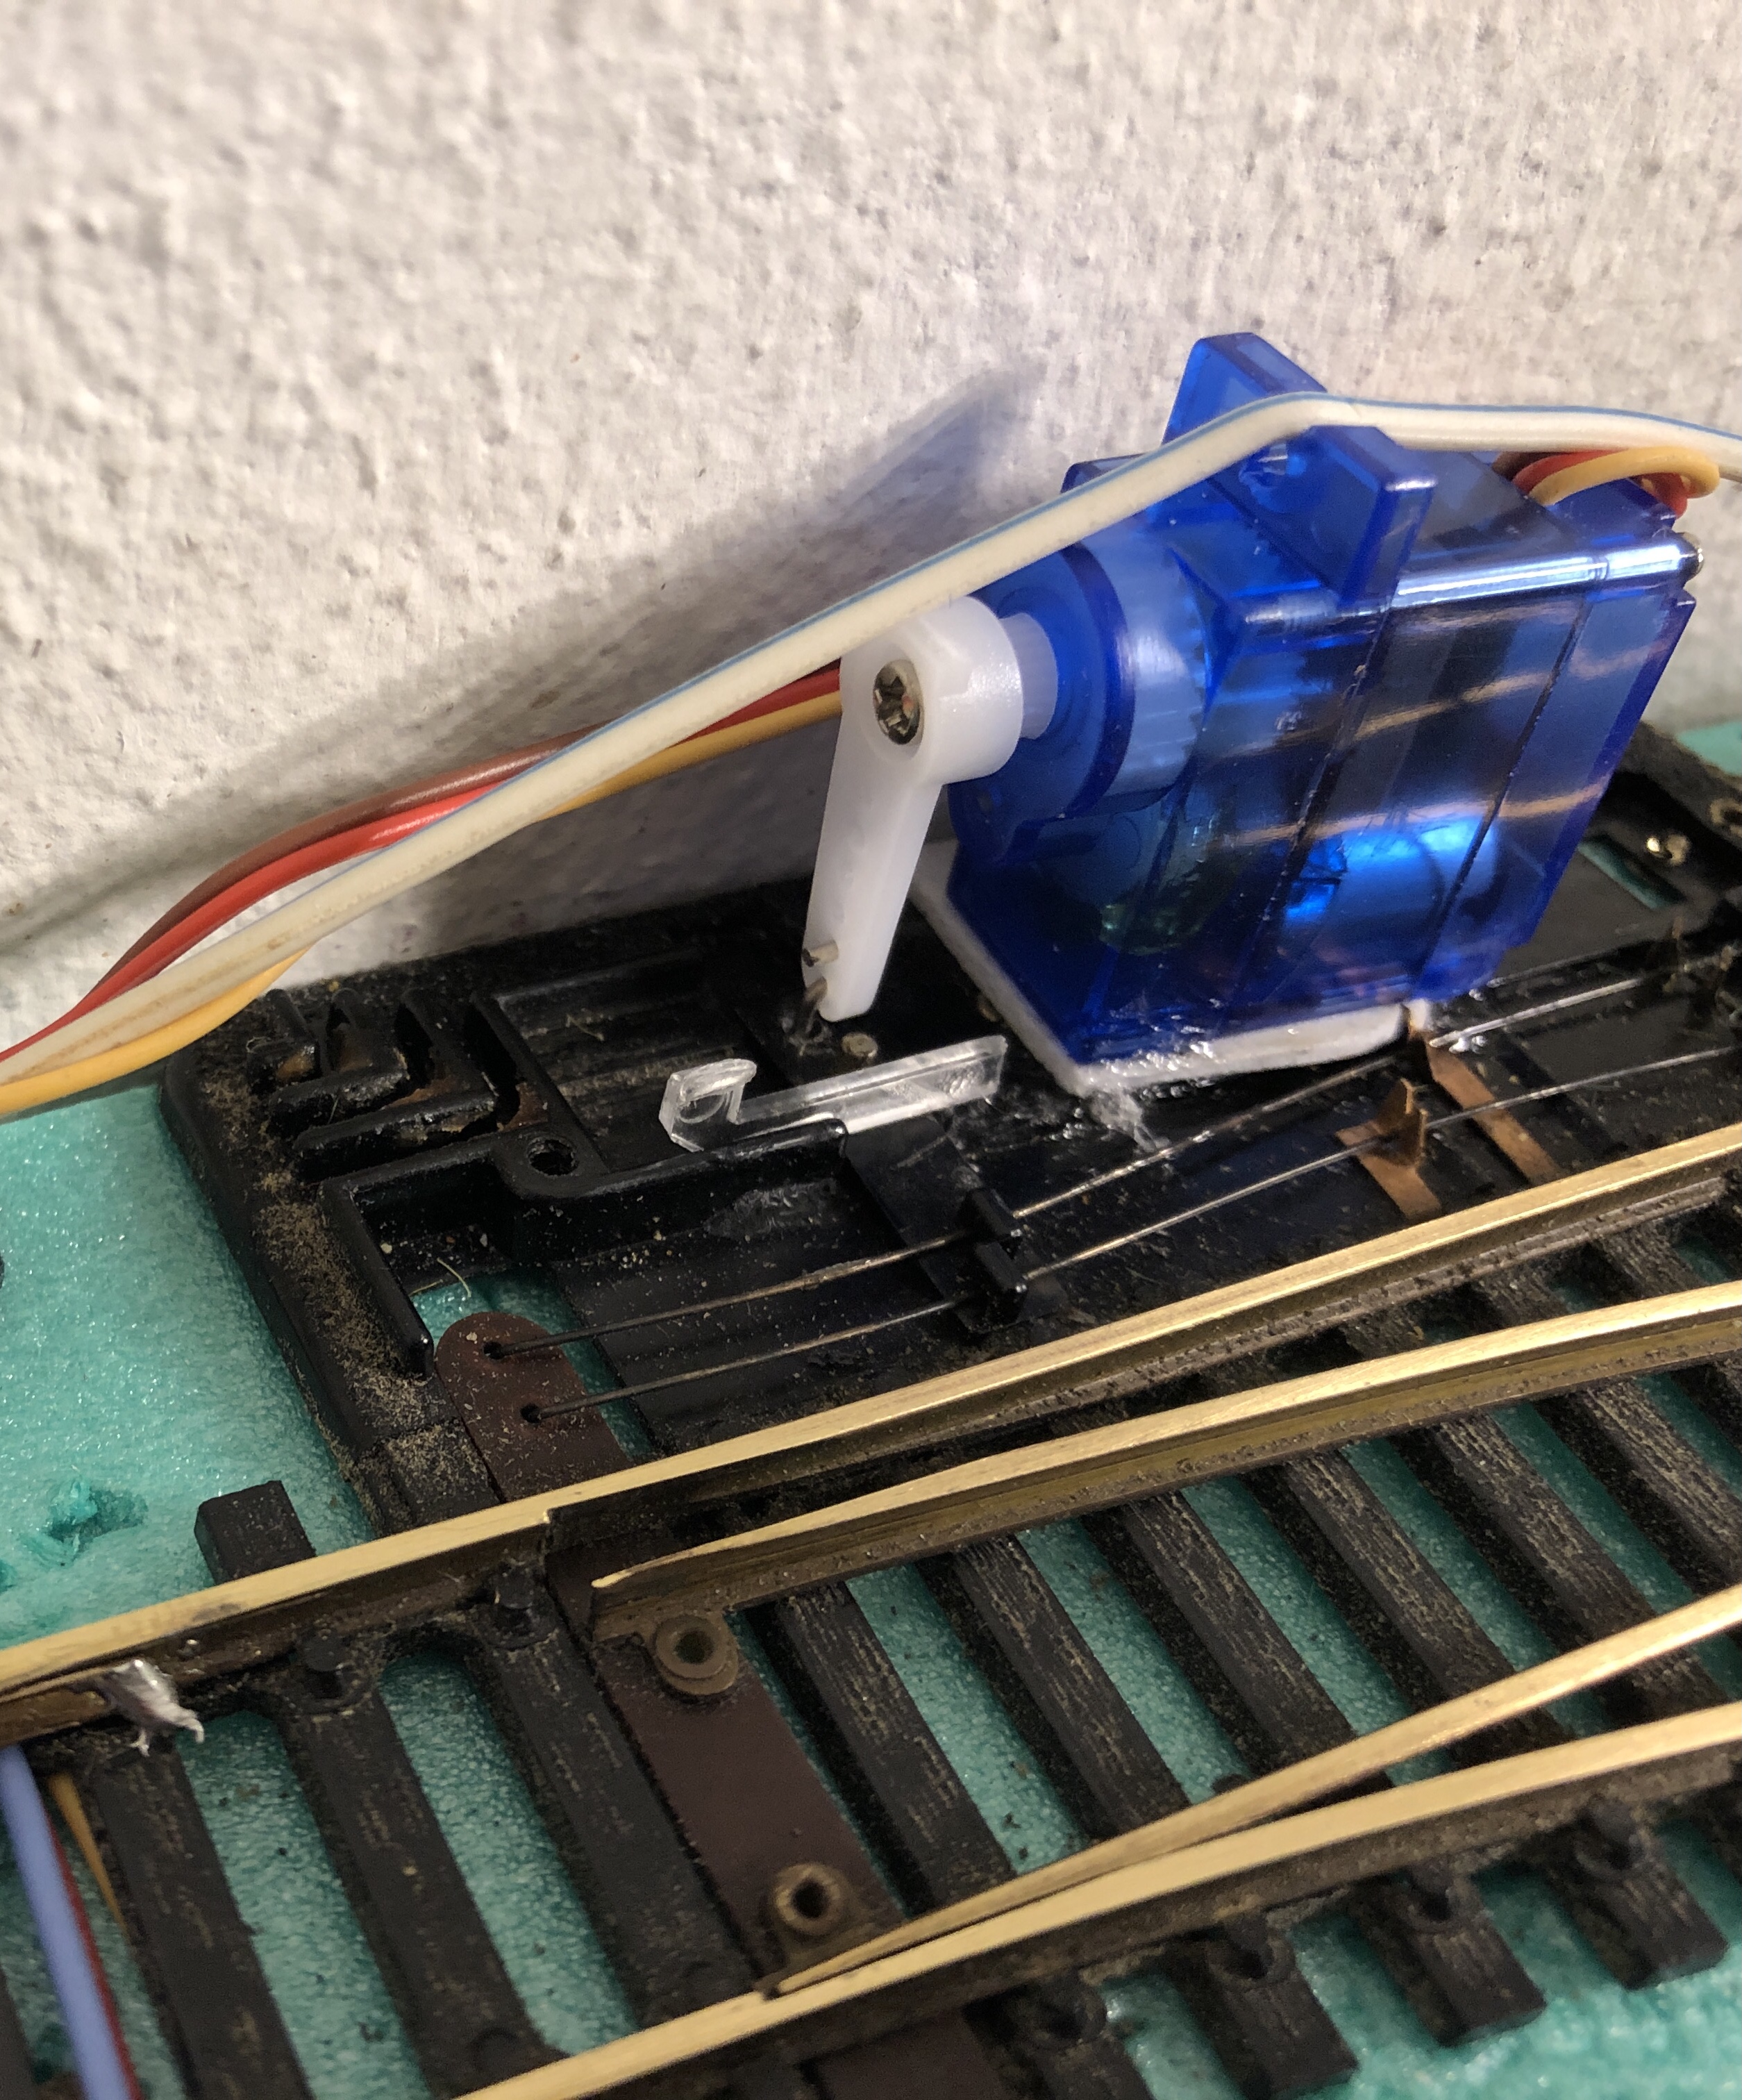
The easiest was to use the existing frame of the switch. The servo now only has to turn a couple of degrees.
It appears to work fine and I put it into practise.
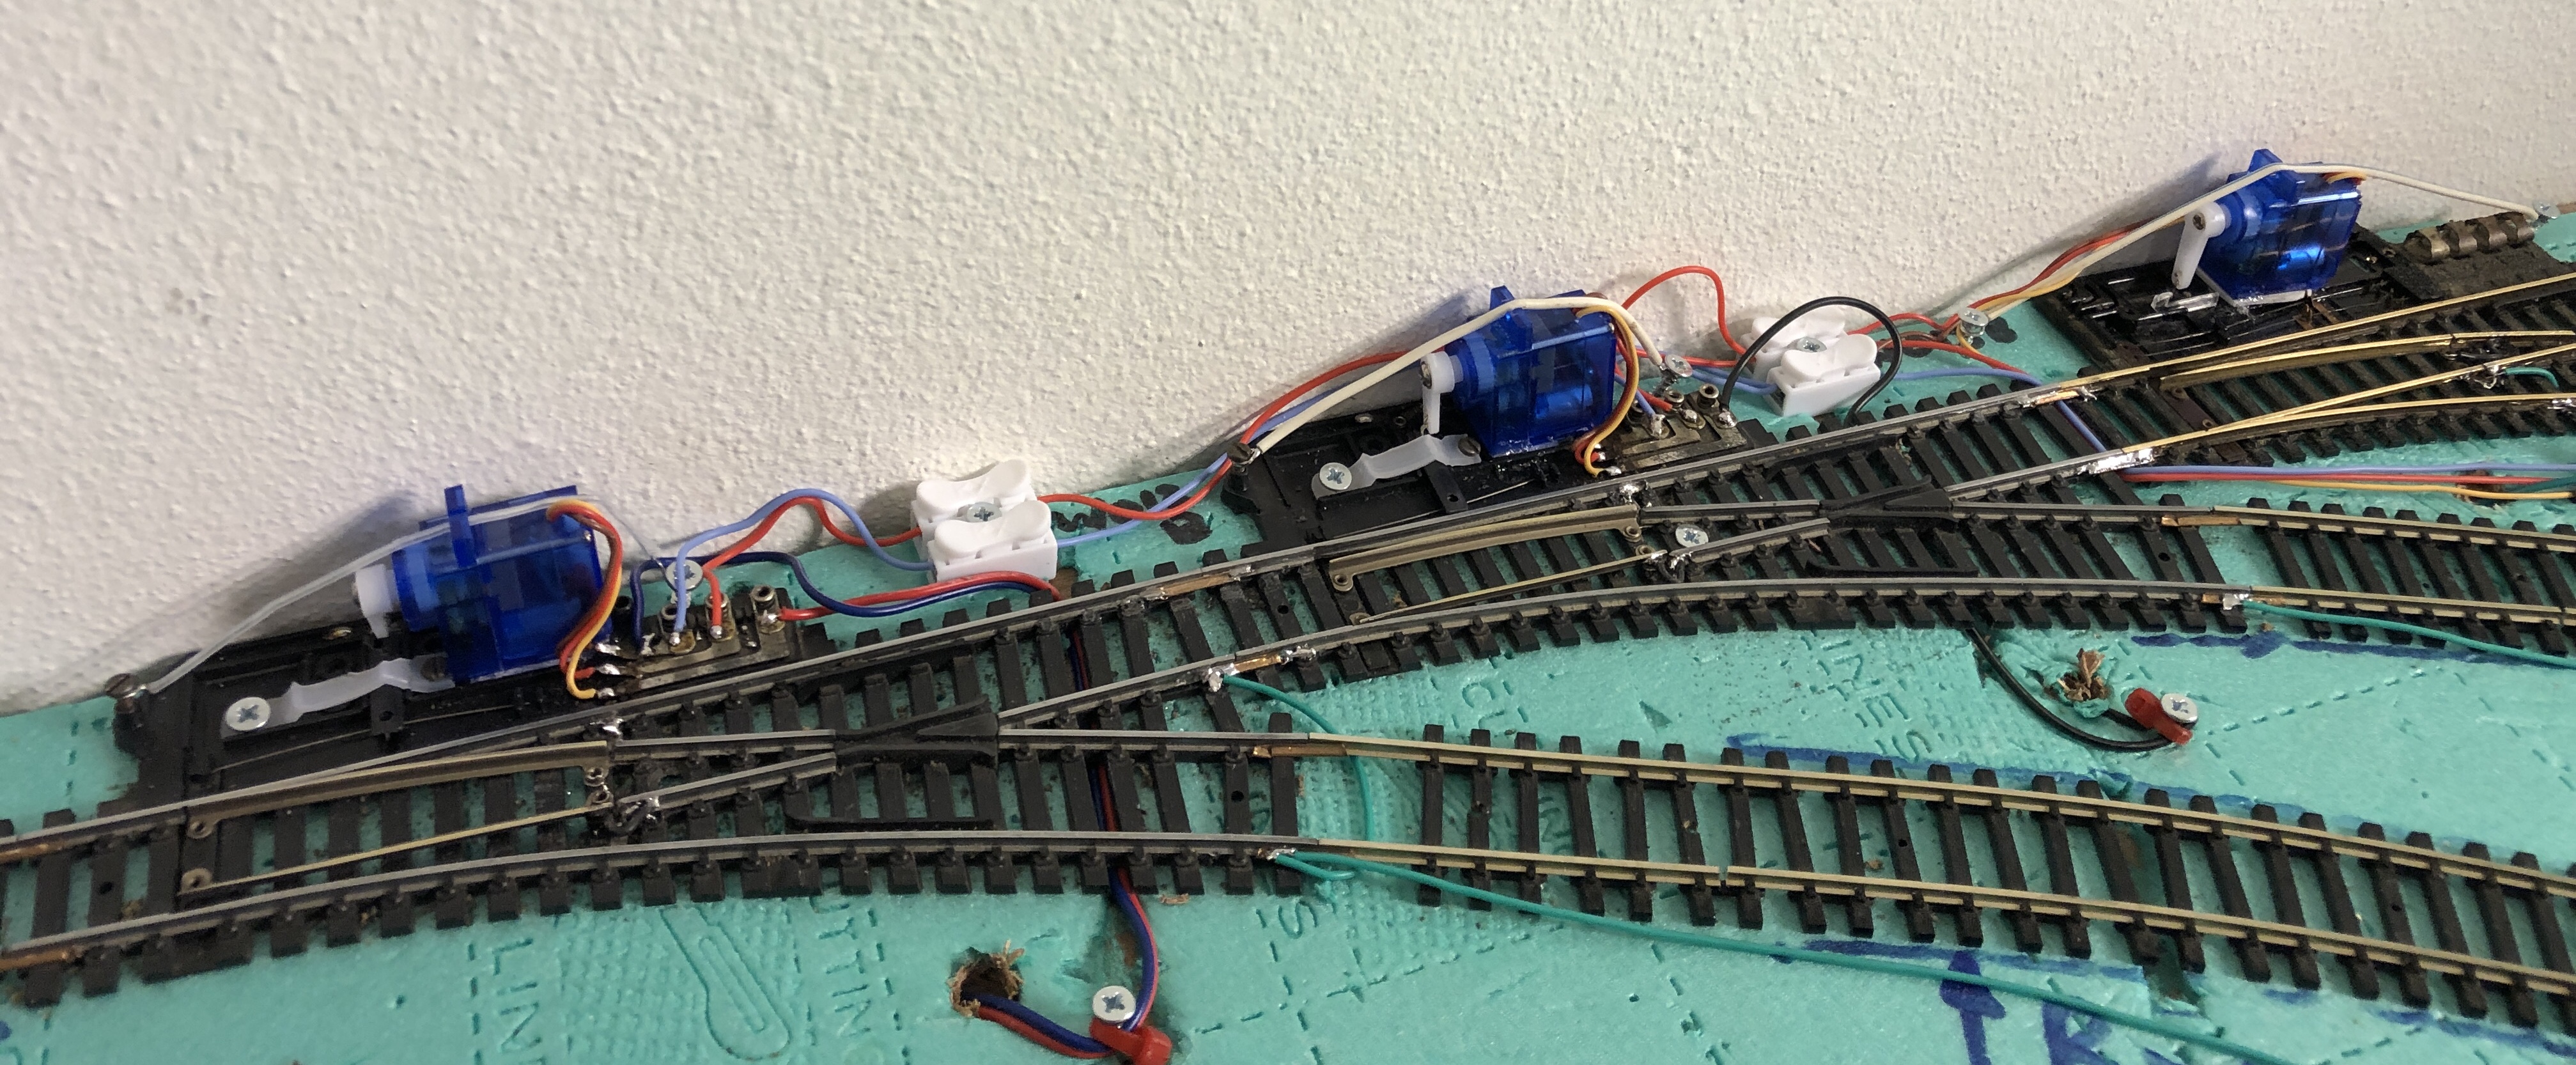
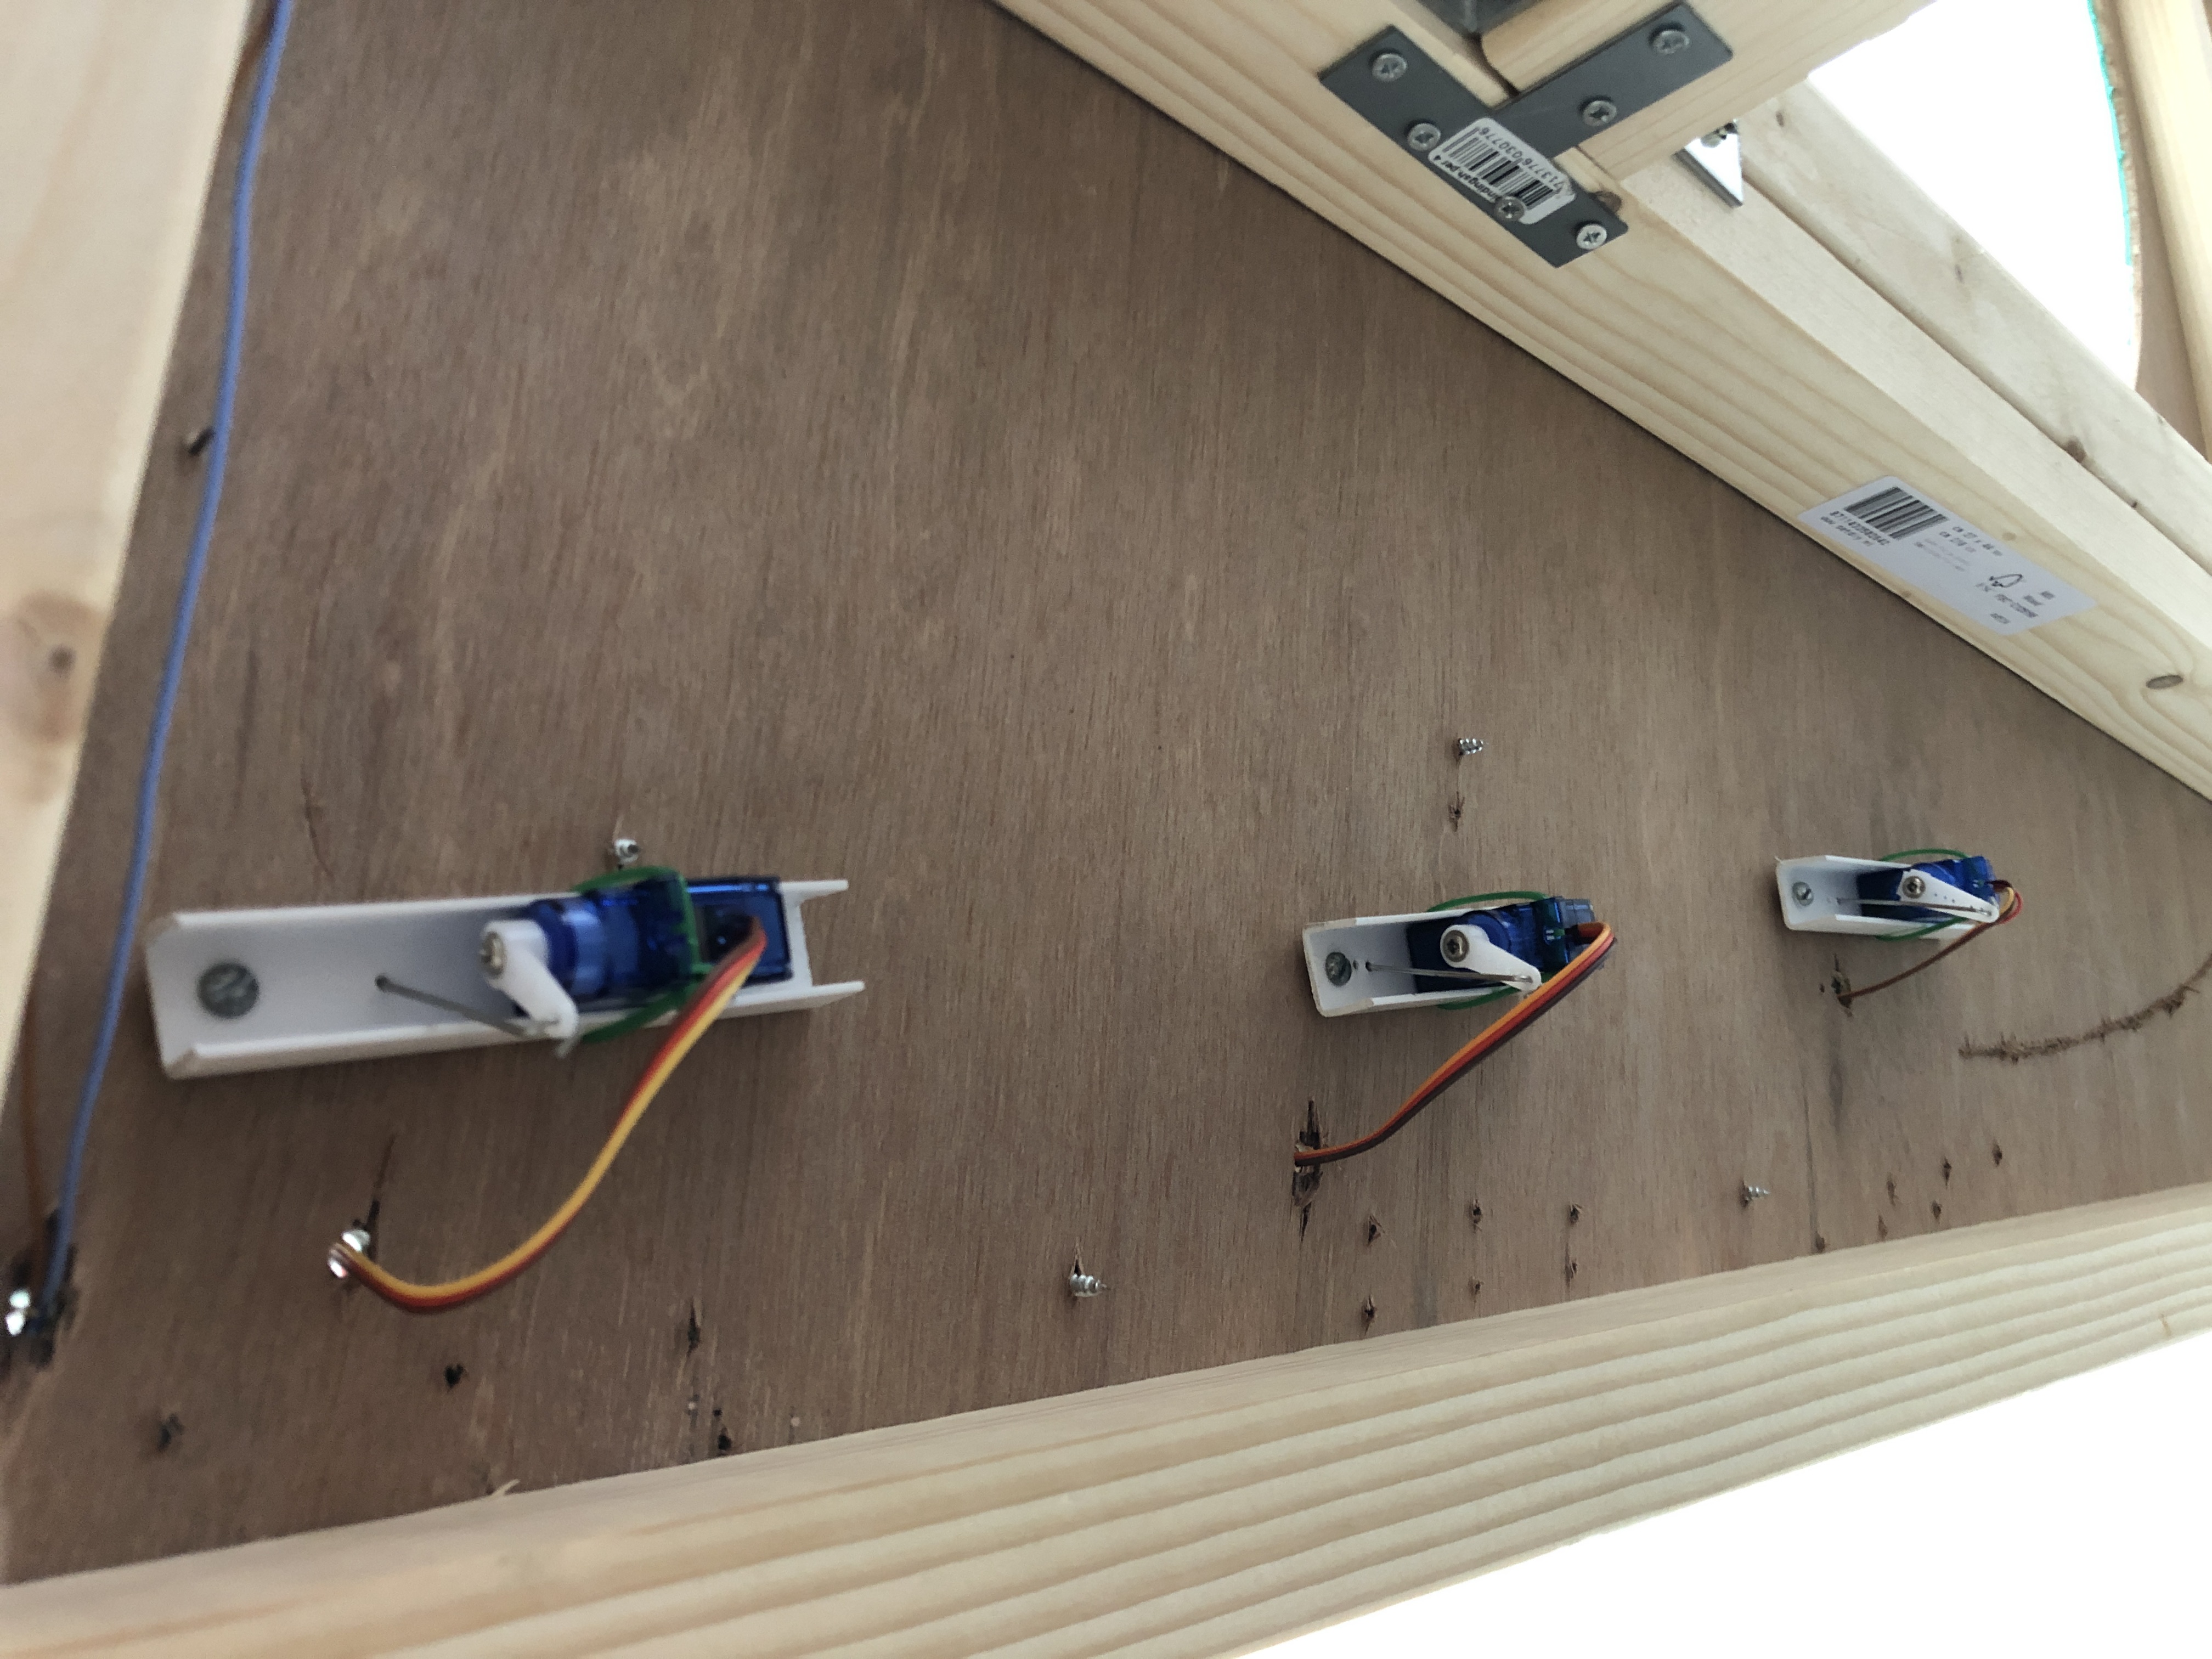
The preferred method is to mount the servo's below the switches. Because a thick beam is mount under switches (from the frame), I had to mount them on top. That will be no problem, as this is the shadow station. You won't see them anymore.
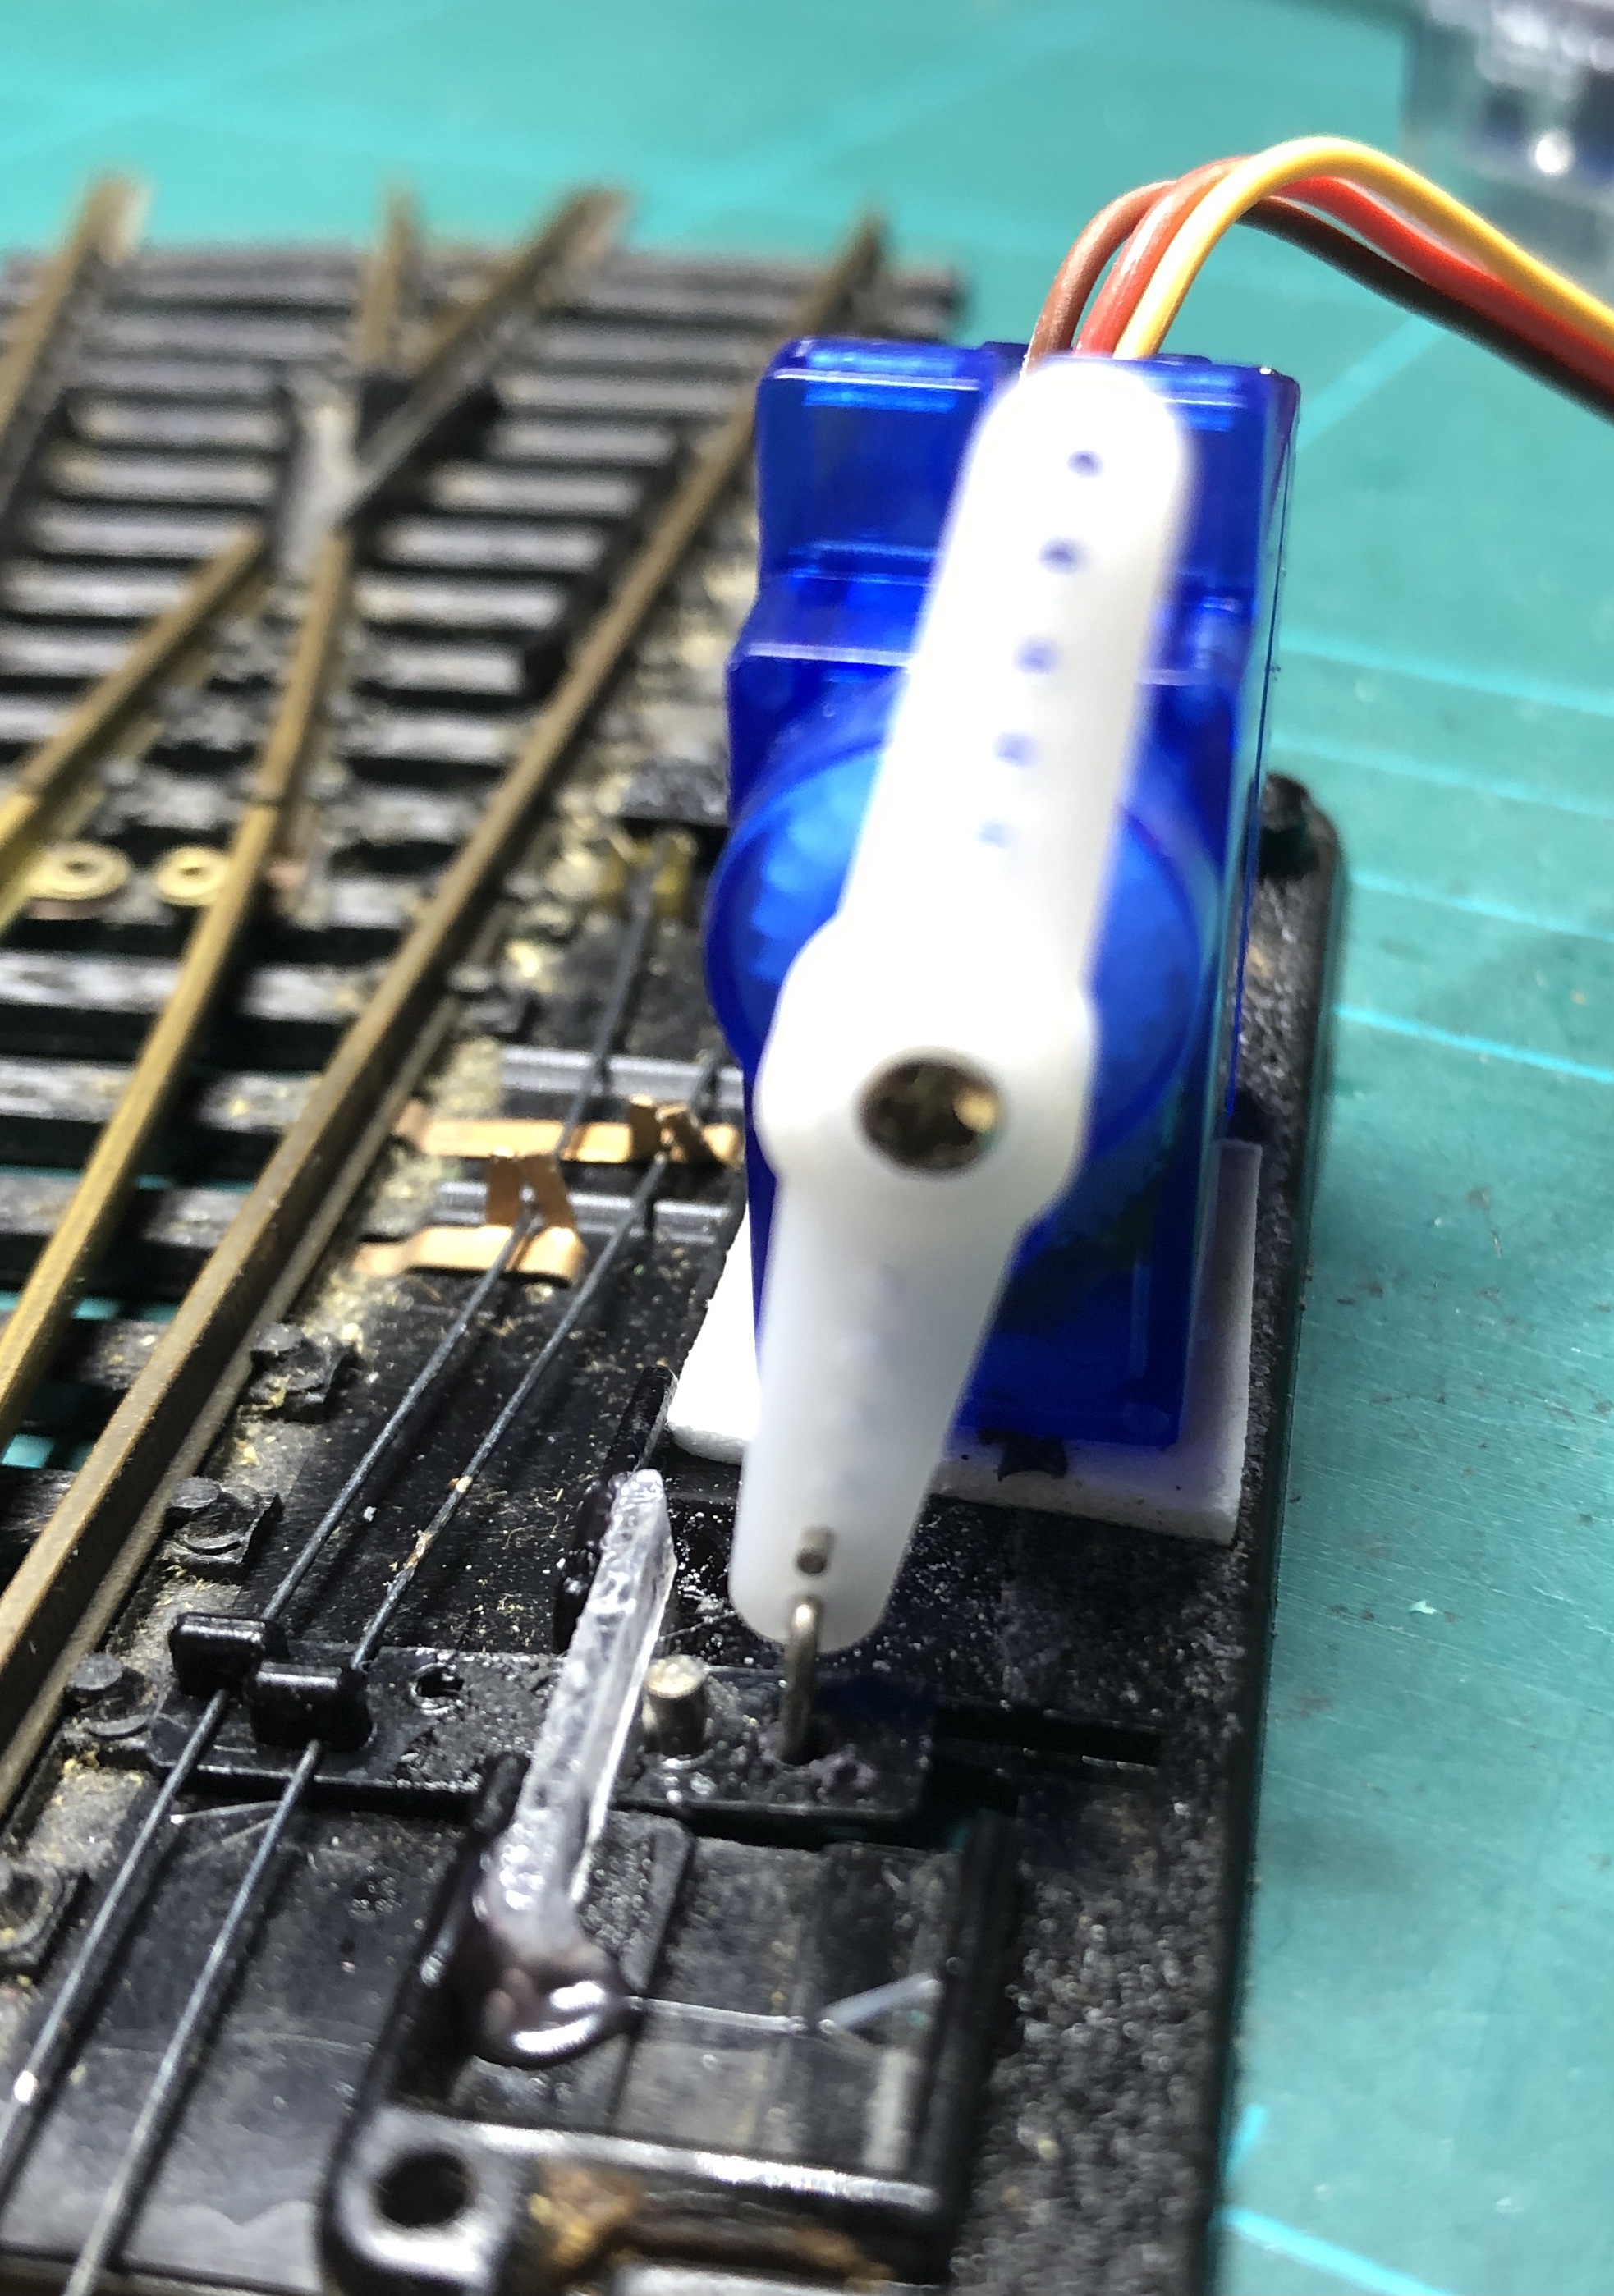
Detail
June 2021
Overal not much time for the modeltrain table, besides works and private life.
Still found some hours to mount the other servo's under the switches at the other end of the table.
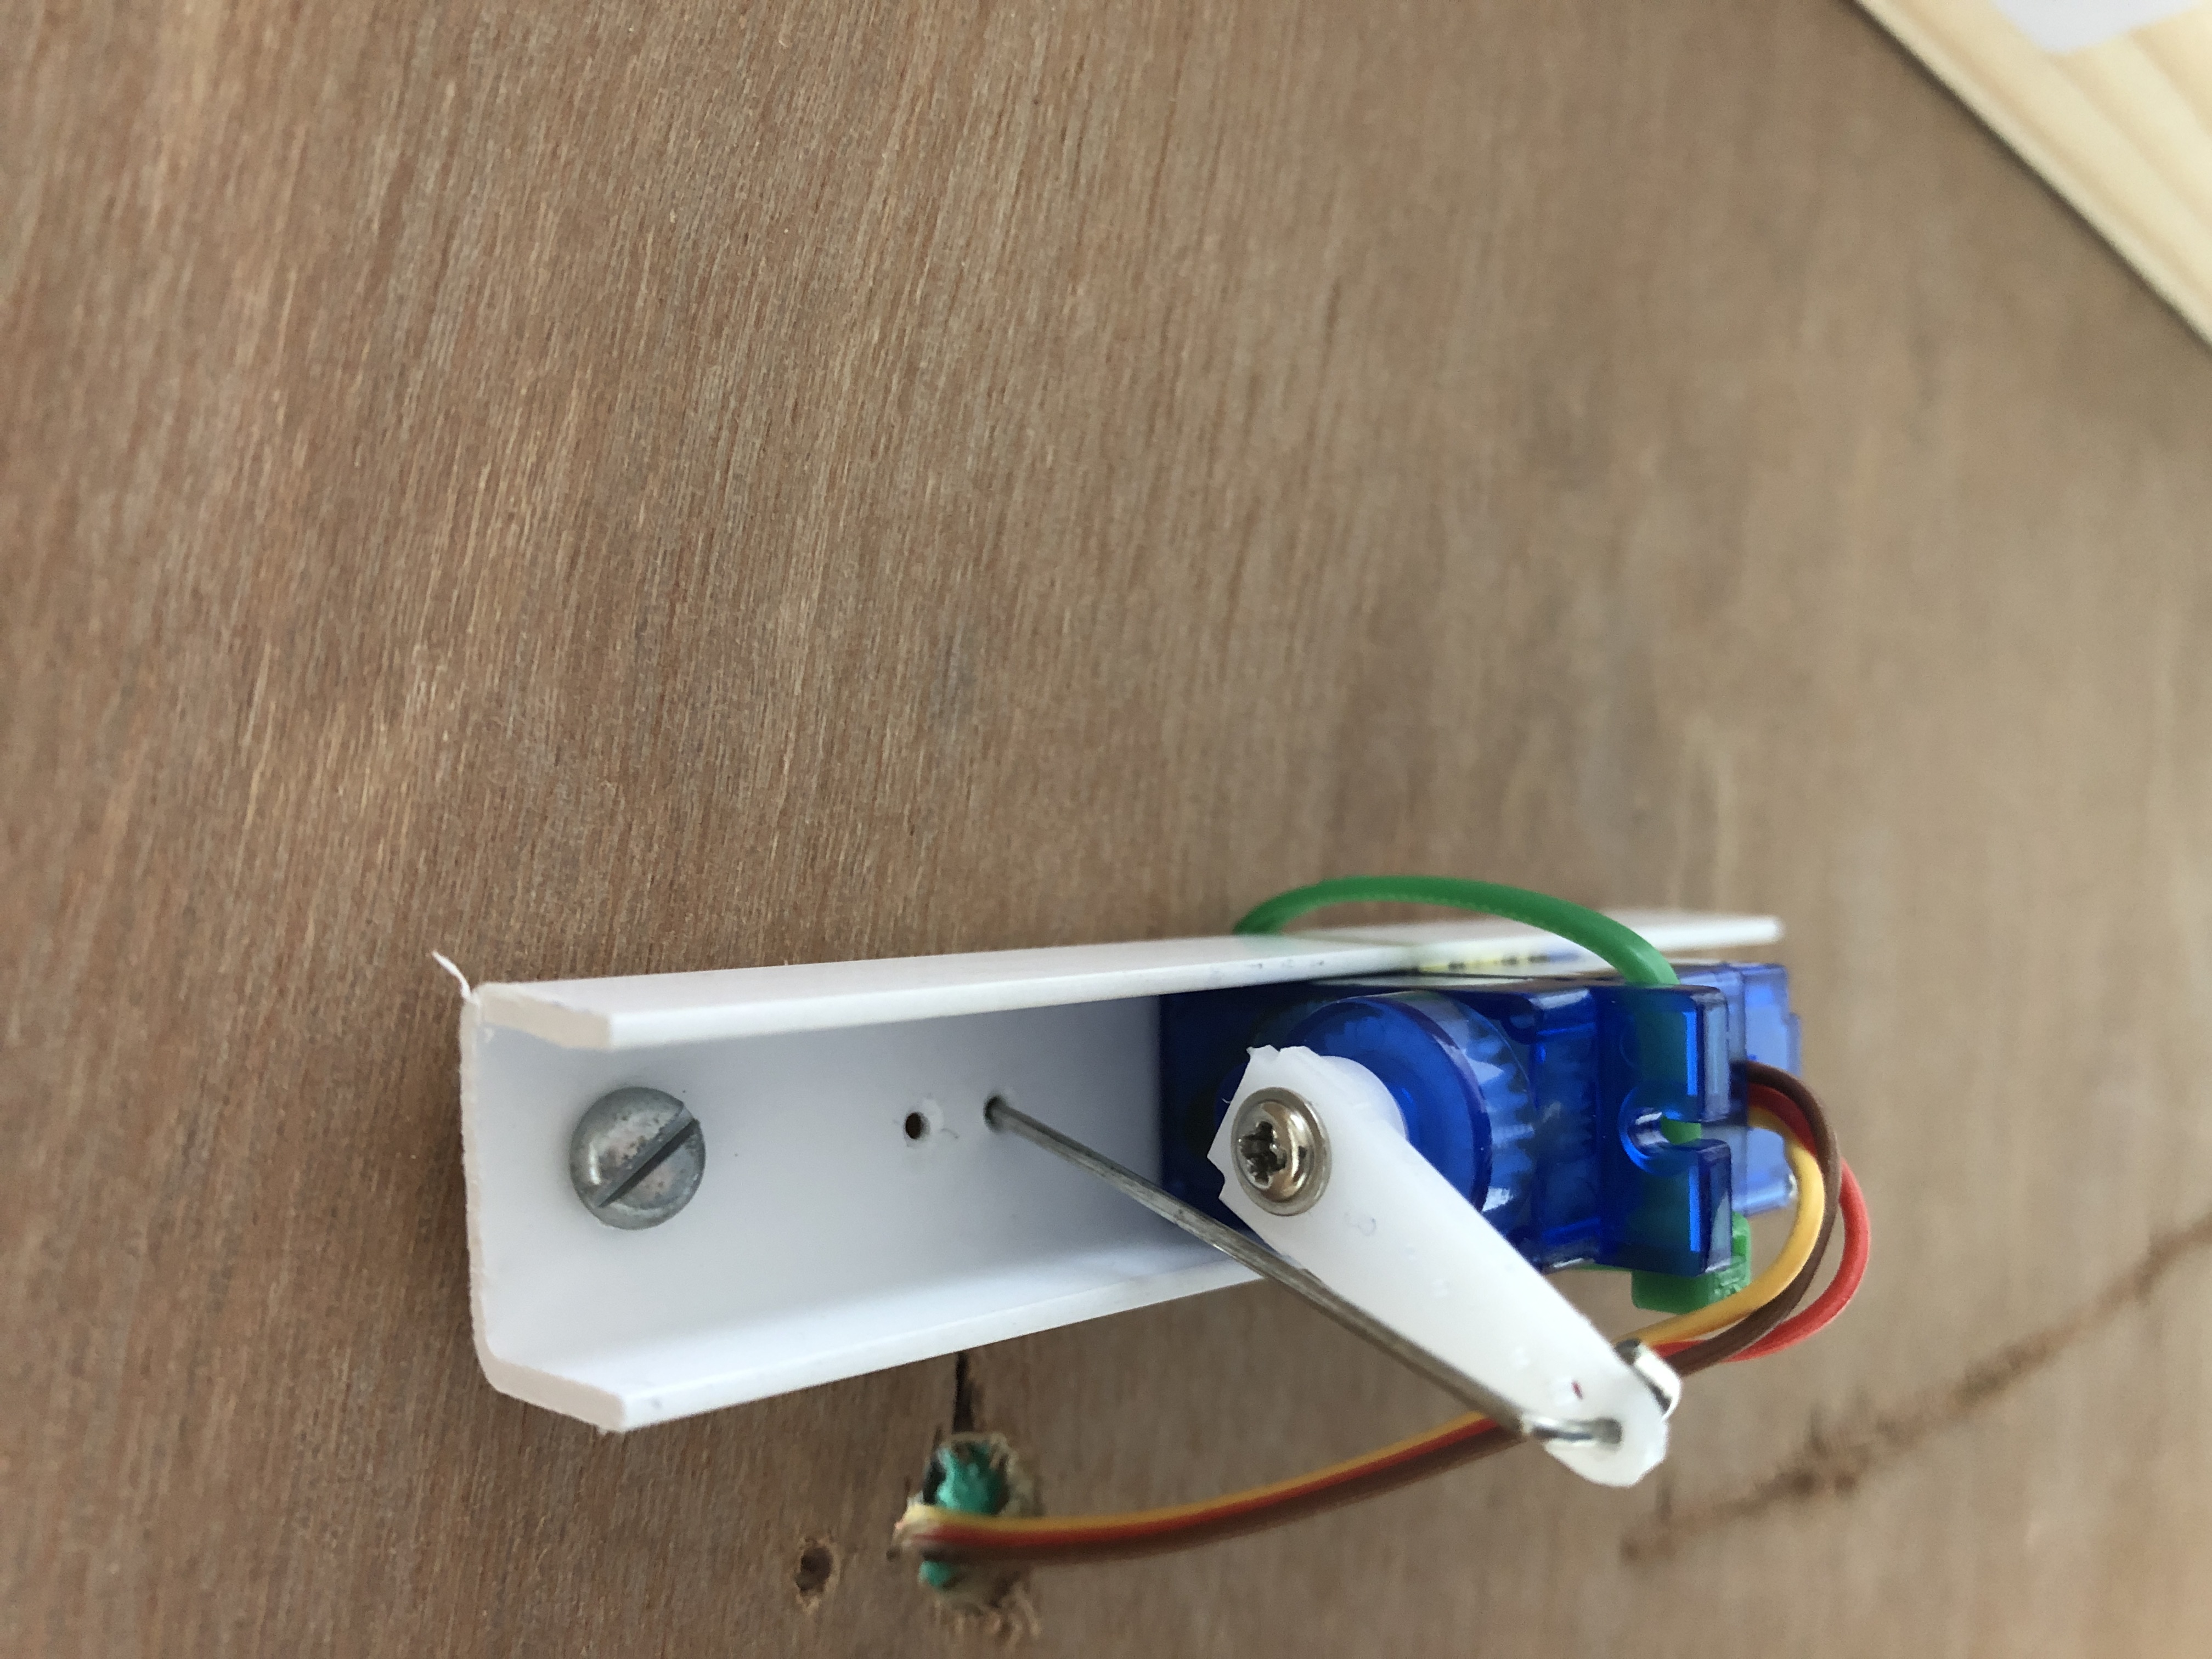
Detail
This is how the servo controls the switch, seen from above.
Didn't drill a hole between the switch tongue. With the movement of the servo, the iron rod will move up and down too. That may cause problems for rolling stock that doen not have enout clearance from the track.
used the existing slider instead.

For the main track I will use other switches and the mechanism should almost be invisible.
To be continued....